You love that crisp, soothing look that makes a room feel calm and airy — that gentle simplicity of White Home Decor. Whether you're refreshing a tiny apartment or staging a whole house, these ideas are meant to feel fresh, not cold. You'll find approachable projects and "recipes" for DIY pieces, styling tips, and small updates you can finish in an afternoon.
This roundup of 23 White Home Decor ideas mixes easy DIYs, small buys, and styling recipes to get the look right away. I mention tools you'll actually use, like my favorite paint brush set for clean edges and a handheld steamer to make linens look crisp. Use these step-by-step "recipes" to create soft textures, layered whites, and warm accents that keep spaces inviting.
Pick a project, gather the materials, and let's make your rooms feel brighter and calmer with simple White Home Decor ideas that really work.
1. Whitewashed Floating Shelves
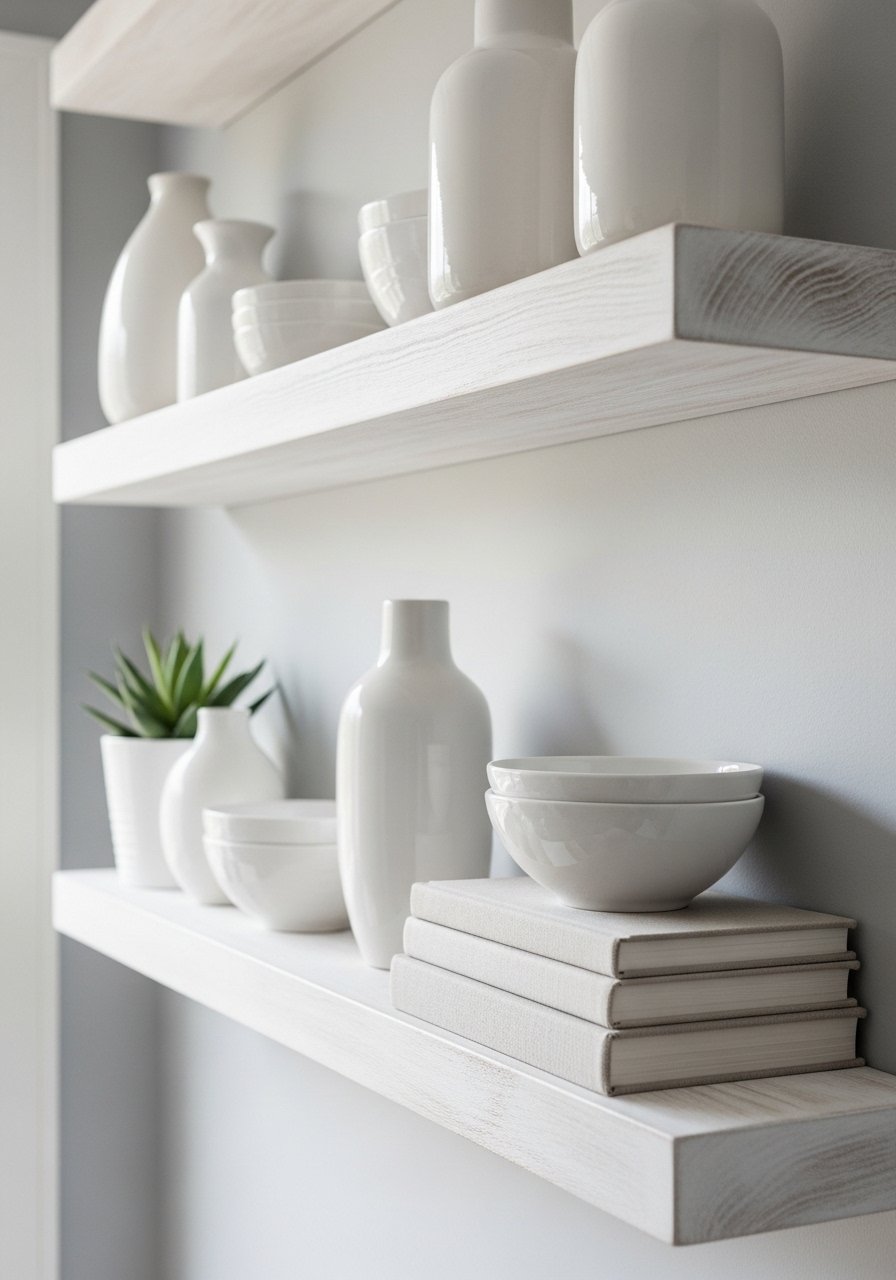
These whitewashed floating shelves give you storage that reads bright and modern. The light wash lets wood grain peek through for texture, so the shelves don't look flat. They feel airy on the wall and are great over a desk or in a bathroom.
I use a small angled sash brush to get the thin, streaky wash that looks intentional.
Ingredients
- 2 (1×10) pine boards, 36 inches each
- 1 cup white latex paint (eg. satin)
- 1/4 cup water (for thinning)
- 4 floating shelf brackets (36-inch compatible)
- 12 wood screws (1.5-inch)
- 2 wood filler sticks (white)
- 1 sandpaper block (120 and 220 grit)
- 1 measuring tape
- 1 pencil
- 1 level
- Protective gloves
Instructions
- Sand boards with 120 grit to remove roughness, then finish with 220 grit for smoothness. Wipe dust with damp cloth.
- Mix 1 cup paint + 1/4 cup water in a cup to create a translucent wash. Stir well.
- Apply thin strokes along the grain with an angled sash brush. Wipe excess on paper towel for streaky effect.
- Let dry 30 minutes; add a second light coat if desired for more opacity.
- Mark bracket locations on wall with a level and pencil; ensure studs or use anchors.
- Drill pilot holes, attach floating shelf brackets with 1.5-inch screws.
- Slide shelves onto brackets; fill screw holes with white wood filler, sand lightly when dry.
- Style with white bowls, small plants, and framed prints.
How to Serve It
Display open-weave baskets or white ceramic vases on the shelves for softness. Pair with a nearby framed print on a small easel for variety. To protect the finish, line shelf bottoms with thin felt pads under ceramics. These shelves make a neutral backdrop for seasonal accents and are easy to repaint if you change the palette.
2. Crisp White Throw Pillow Covers
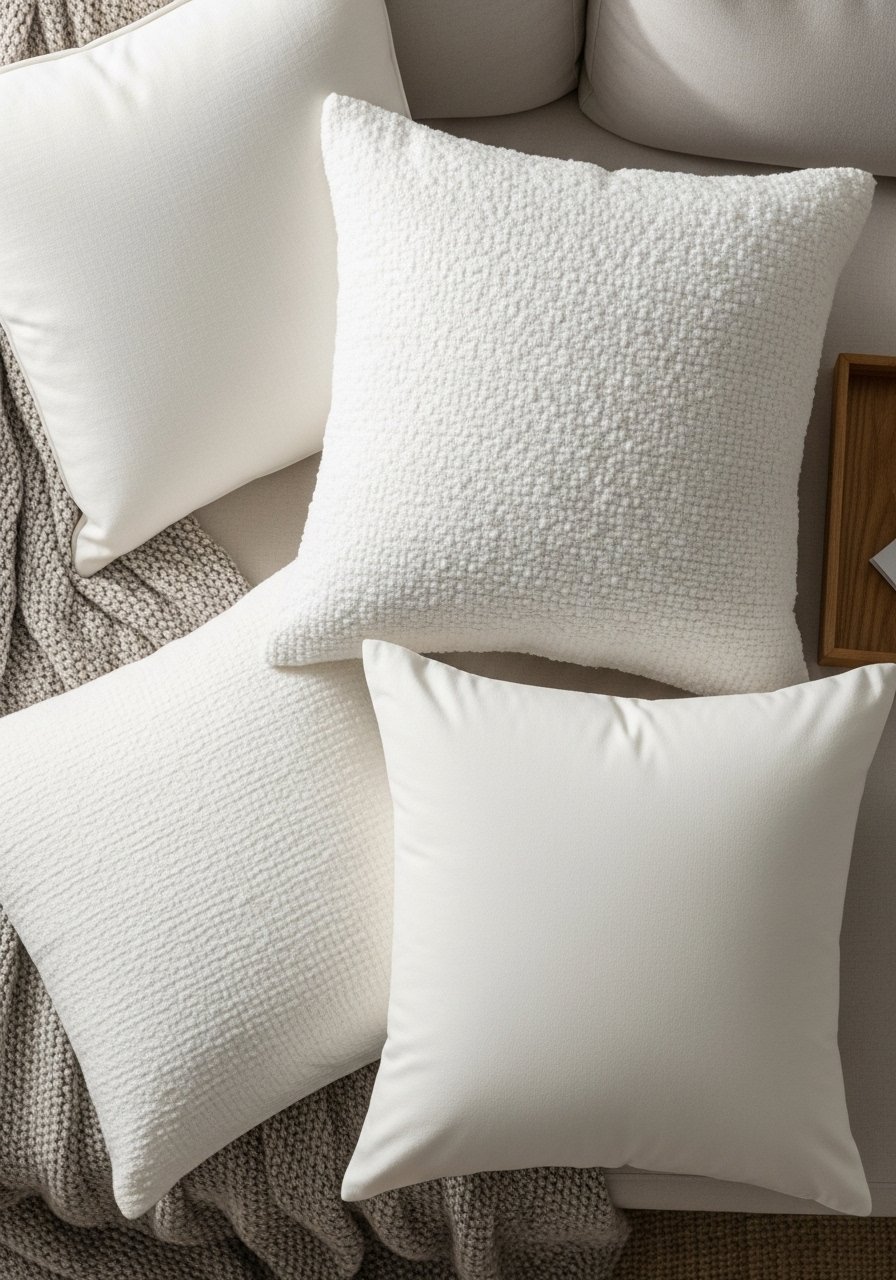
Switching pillow covers is one of the fastest White Home Decor "recipes" to refresh seating. Using different textures—linen, cotton, boucle—keeps the look interesting even while staying monochrome. These covers are breathable and machine-washable for everyday life.
I finish seams neatly with a sewing gauge when hemming the envelope closure.
Ingredients
- 2 yards pre-washed white linen fabric
- 1 yard white cotton (for lining)
- 4 18×18 pillow inserts (down or down-alternative)
- 12 in. zipper (optional)
- Thread (white, polyester)
- Tailor's chalk
- 1 sewing needle pack
- Straight pins
- Scissors
- Measuring tape
- Iron and ironing board
Instructions
- Cut two 19×19-inch squares for each cover (allowing 1/2-inch seam). Cut lining if desired.
- If using envelope back, cut two rectangles: 19×12 and 19×10 inches.
- Hem raw edges of the envelope pieces by folding 1/4 inch, pressing, then folding 1/2 inch and stitching.
- Pin right sides together: front square plus two back rectangles overlapping. Stitch 1/2-inch seam on three sides.
- Turn right-side out and press flat; slip in pillow insert to check fit.
- Topstitch around the edges 1/8 inch for a finished look.
- For zipper closure, follow zipper insertion instructions with invisible zipper foot.
- Repeat for remaining covers.
How to Serve It
Mix textures—place linen and boucle on opposite ends for balance. Keep a spare set in a fabric storage bin for quick swaps. Wash covers on gentle cycle, tumble low or air dry to preserve texture. These covers work well with a subtle neutral throw and warm wood tones.
3. Whitewashed Centerpiece Tray
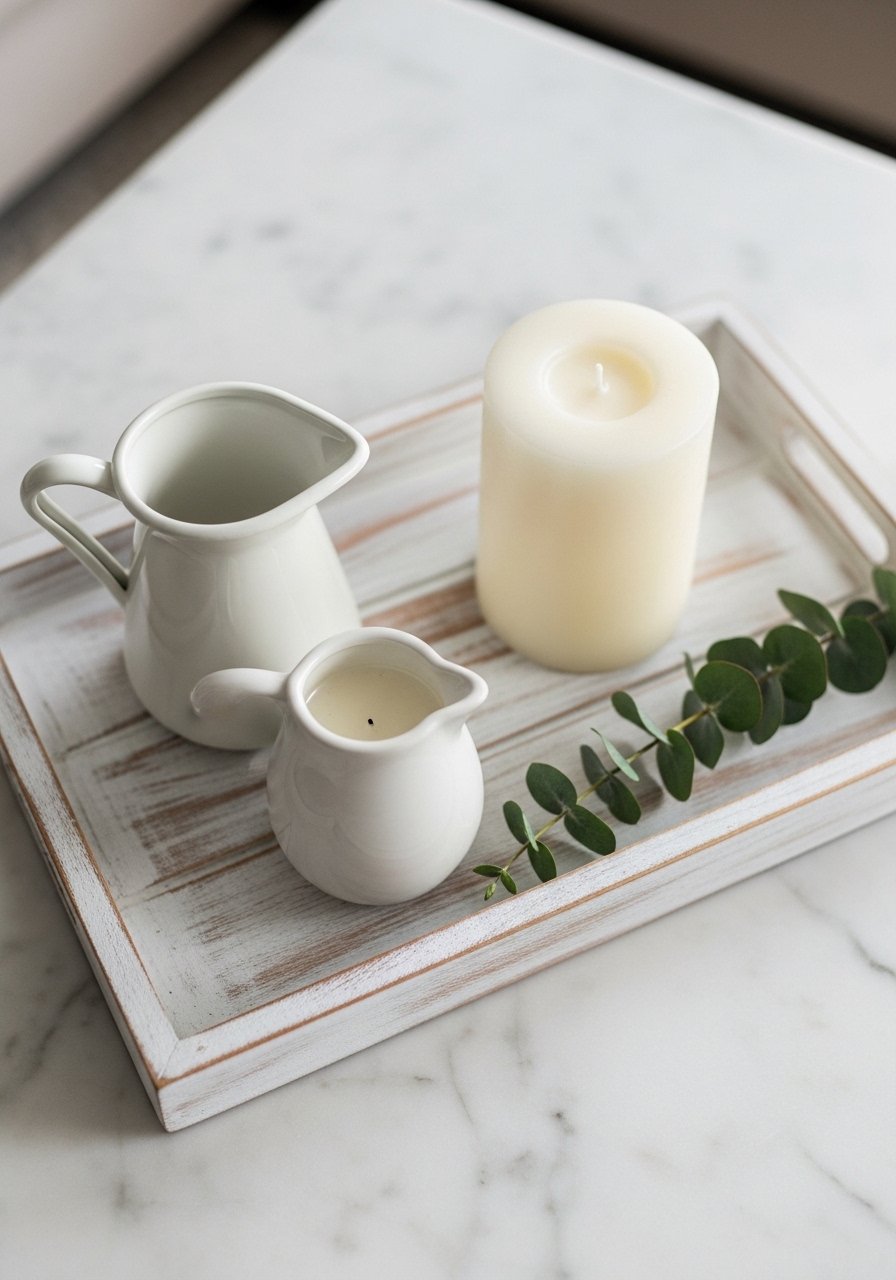
A whitewashed tray anchors coffee tables and consoles with subtle texture. The soft finish diffuses the wood tone, creating a cozy focal point that coordinates with other White Home Decor pieces. This project is quick and gives big style payoff.
Use a foam brush set for a smooth, streak-free wash.
Ingredients
- 1 wooden serving tray (unfinished, 14×10 inches)
- 1/2 cup white craft paint
- 2 tbsp water
- 4 felt pad corners
- Sanding sponge (220 grit)
- 1 small jar for paint mixing
- Clean rag
- 2 small wood screws (if handles need tightening)
- 1 small candle and ceramic vase for styling
- Protective gloves
Instructions
- Lightly sand tray surface to remove rough spots; wipe clean.
- Mix 1/2 cup paint + 2 tbsp water until thin but milky.
- Dip a foam brush into the mix and swipe along the grain; wipe off excess with rag immediately for a translucent effect.
- Let dry 20–30 minutes. Reapply selectively for more coverage.
- Add felt pads to bottom corners to protect surfaces.
- Tighten handles if needed using small screws.
- Style with candle, small vase, and seasonal sprigs.
How to Serve It
Place on a coffee table or entry console with layered books and a small bowl for keys. For outdoor tables, use a large ceramic planter and a waterproof candle. Store tray in a cabinet when not in use to avoid water marks.
4. DIY White Ceramic Planters
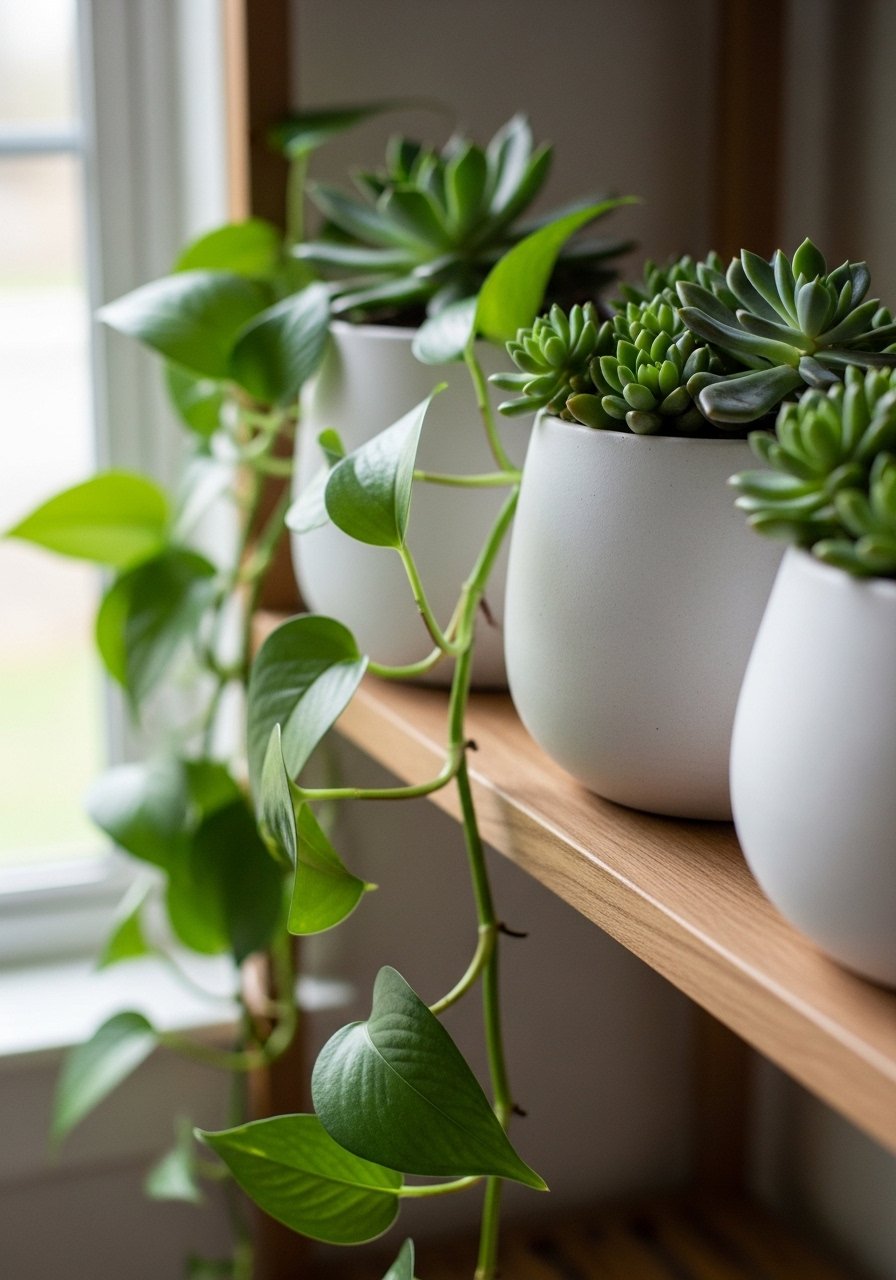
These faux ceramic planters are made from plain terracotta painted and sealed to look like shop-bought ceramics. They brighten window sills and work beautifully with greenery. The matte white finish keeps a modern, natural feel.
A small foam roller gives a smooth, even finish on rounded pots.
Ingredients
- 4 terracotta pots (4–6 inch)
- 1 cup white acrylic paint (matte)
- 1/4 cup primer (optional)
- 1/4 cup clear matte sealer
- Sandpaper (220 grit)
- Painter's tape
- Plastic drop cloth
- 4 saucers (matching)
- Potting mix appropriate for plant types
- Plants (succulents, pothos, herbs)
- Small brush for tight areas
Instructions
- Clean pots with damp cloth; let dry.
- Lightly sand exterior with 220 grit to help adhesion.
- Apply primer if using; let dry 1 hour.
- Using foam roller, apply two thin coats of white acrylic, drying 20–30 minutes between coats.
- Seal with clear matte sealer for durability; let cure 24 hours.
- Fill with potting mix and plant succulents or herbs. Use a saucer to catch extra water.
- Wipe any drips and allow soil to settle one day before regular watering.
How to Serve It
Group three planters of varying heights on a sunny sill for a clean windowscape. Use a watering can with a narrow spout to avoid spills. For long-term care, rotate plants occasionally so foliage gets even light.
5. White Shiplap Accent Panel
Shiplap adds dimension and calm to a room without loud color. A fresh white shiplap panel behind a bed or sofa becomes a quiet statement wall. The soft shadow lines read like subtle patterning.
I use a finish nailer to speed installation and get clean edges.
Ingredients
- 6 tongue-and-groove or shiplap boards (8ft)
- 1 box 18-gauge finishing nails
- 1 caulk tube (paintable, white)
- 1/2 gallon satin white paint
- 1 paint roller and tray
- 1 stud finder
- 1 measuring tape
- 1 level
- 1 miter saw (or handsaw)
- Painter's tape
Instructions
- Find studs and mark a level line where top of panel will sit.
- Cut boards to width as needed; stagger seams for a natural look.
- Paint boards before installation with two coats satin white; let dry fully 4 hours.
- Starting at bottom, nail boards into studs using a finish nailer, ensuring tight fit between boards.
- Fill nail holes with paintable caulk; smooth seams with finger or putty knife.
- Touch up paint over filled areas; let dry 2 hours before hanging decor.
- Style with a simple mirror or framed art.
How to Serve It
Add soft sconces or floating shelves against the shiplap for a layered look. Use white-framed artwork to keep things cohesive. Clean with a slightly damp microfiber cloth. This wall works beautifully in bedrooms, entryways, or behind kitchen banquettes.
6. Whitewashed Picture Frames
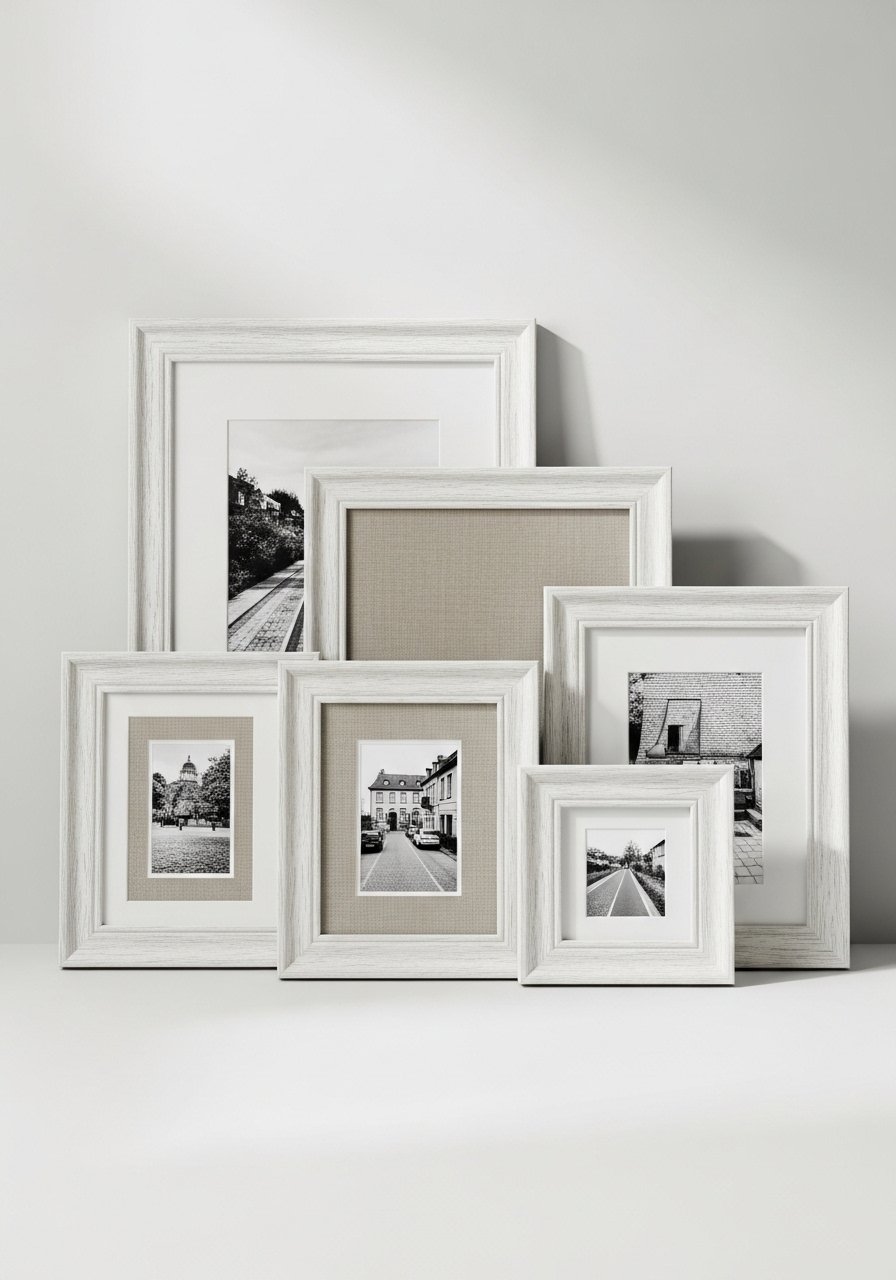
Whitewashed frames make photos or prints pop while keeping the display airy. You can turn thrifted frames into a curated photo wall that reads Nordic-minimal. The wash softens wood grain and unifies mixed-frame collections.
A small rotary sander speeds prep for older frames.
Ingredients
- 6 assorted wooden frames
- 1 cup white paint (mixed with water for wash)
- 1 small foam brush
- 1 sanding sponge
- Picture hanging kit (wire and hooks)
- Matboard (optional)
- Clean cloth
- Ruler
- Hanging level
Instructions
- Remove glass and backing from frames; sand surfaces lightly.
- Mix paint wash: 1 cup paint + 2–3 tbsp water.
- Brush wash along grain; wipe back immediately for desired translucence.
- Let dry 20 minutes; sand gently for a distressed look.
- Reassemble frames with photos or prints; use matboard for a gallery look.
- Plan layout on the floor before hanging; mark wall, and use level and picture hanging kit to mount.
How to Serve It
Create a gallery wall with consistent spacing between frames (2–3 inches). Use a picture hanging template for easy layout. Rotate seasonal prints or family photos for a fresh display.
7. Minimal White Macramé Wall Hanging
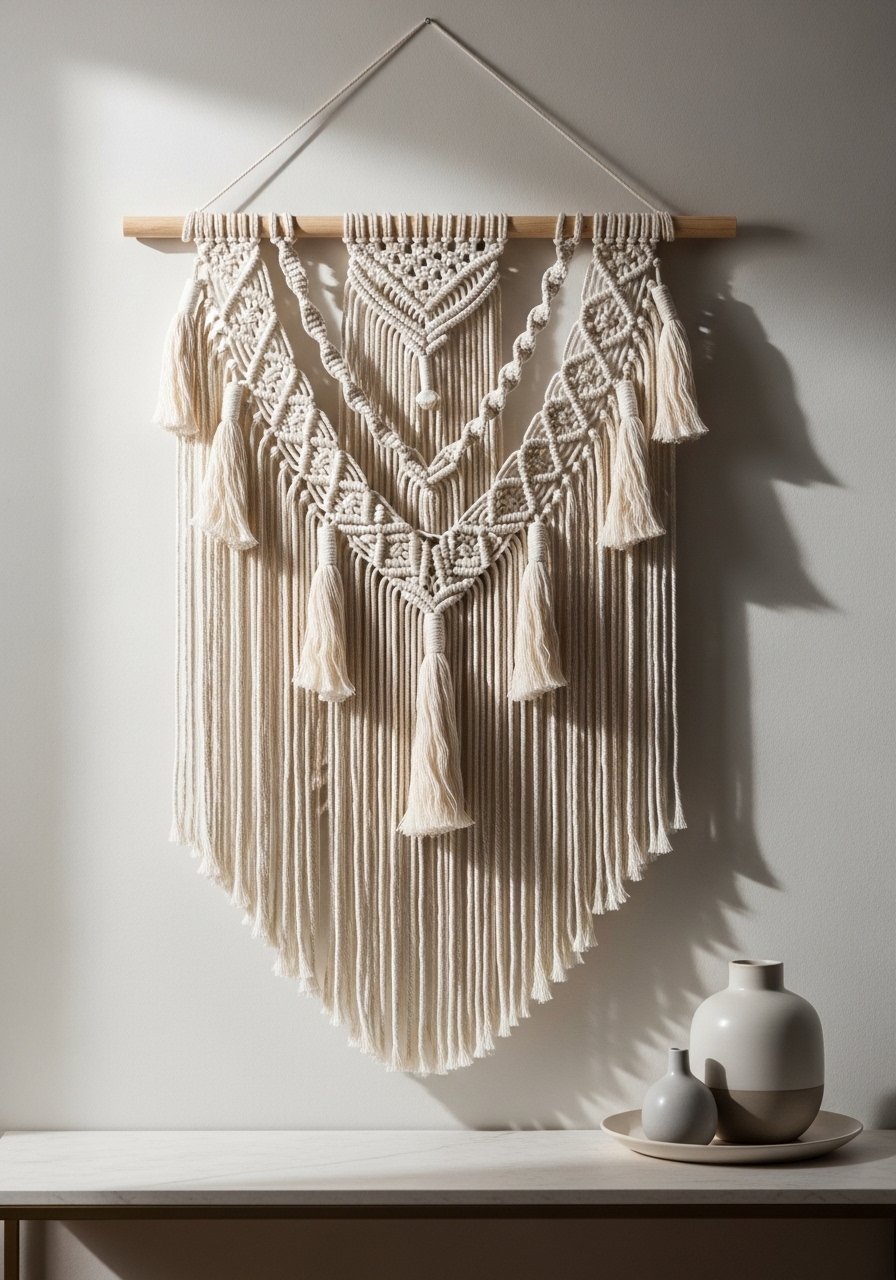
Macramé adds texture without color—perfect for White Home Decor. This pared-back design focuses on knotting patterns and fringe length. It’s tactile yet elegant, lending warmth to a blank wall.
A natural cotton macramé cord works well for soft drape.
Ingredients
- 100 yards 3–5mm white cotton macramé cord
- 1 wooden dowel (24 inches)
- 1 pair scissors
- 1 tape measure
- 1 comb (for fringe)
- Masking tape
- 1 small hook for hanging
Instructions
- Cut cords: 12 lengths of 6 feet each (adjust for fringe).
- Attach cords to dowel using lark's head knots.
- Create alternating square knots down the center for 12–15 inches.
- Make diagonal half hitch rows on each side to create chevron shapes.
- Trim bottom into a gentle V; comb fringe for fullness.
- Tie a short cord at each dowel end for hanging; secure hook on wall.
- Adjust knot spacing and fringe length as desired.
How to Serve It
Hang above a bed or console for a soft focal point. Pair with small potted plants or white ceramics for balance. To freshen fringe, lightly steam from the back with a handheld steamer and comb again.
8. Painted White Table Runner
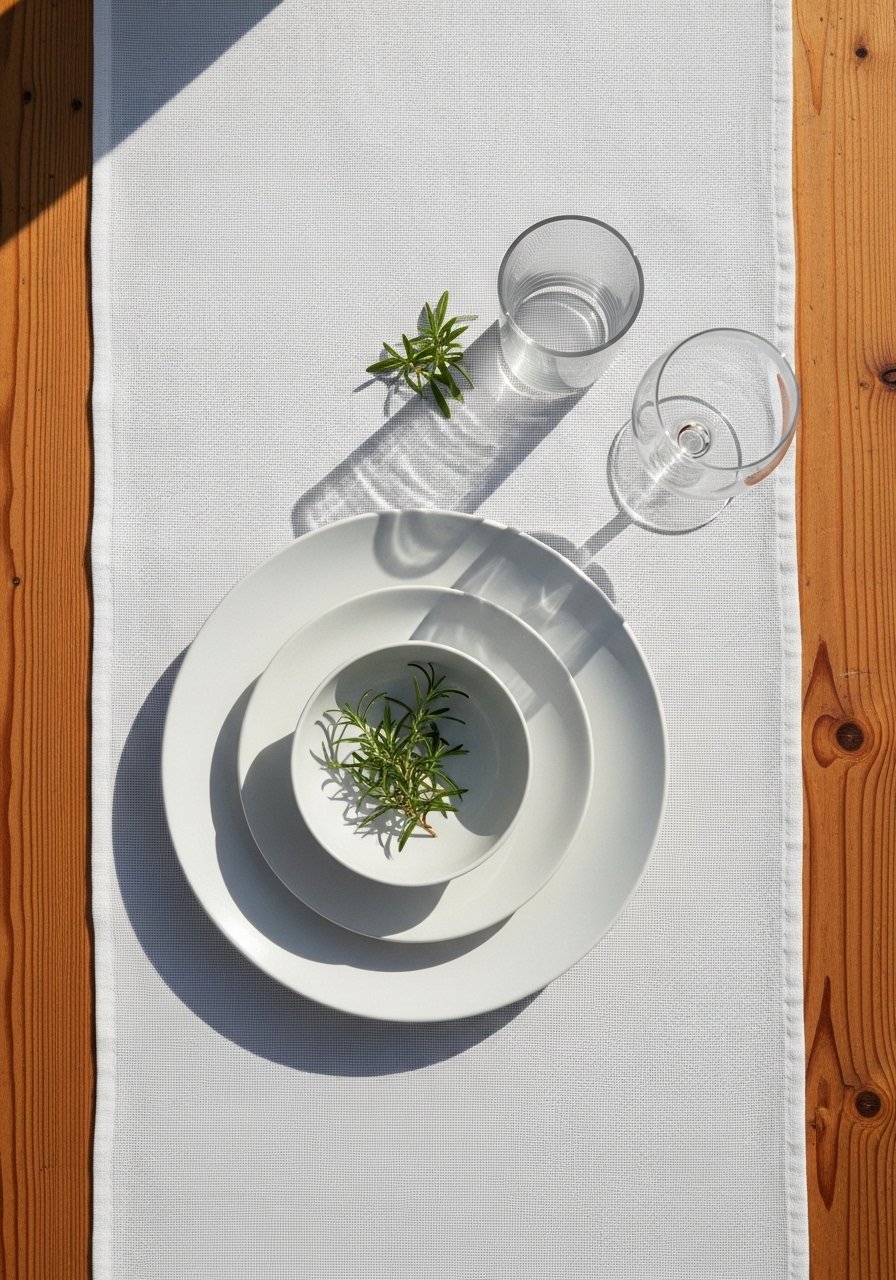
A painted or stenciled white runner keeps a wood table visible while brightening the setting. This version uses washable fabric paint for easy care and a soft, layered look. Great for everyday dining or a simple brunch.
Use a fabric medium with acrylic paint to keep fabric soft.
Ingredients
- 1.5 yards white linen or cotton runner
- 3/4 cup white fabric paint
- 2 tbsp fabric medium (if using acrylic)
- Painter's tape or stencils
- Foam rollers or stencil brushes
- Drop cloth
- Measuring tape
- Iron
Instructions
- Wash and dry fabric to pre-shrink. Press flat.
- Mix paint with fabric medium per package directions.
- Lay runner on drop cloth and secure with painter's tape.
- Apply paint with foam roller for even coverage or use stencil for pattern.
- Let dry 1 hour; add second coat if needed.
- Heat-set paint with iron on underside per paint instructions (usually 3–5 minutes).
- Wash on gentle cycle first time; air dry.
How to Serve It
Pair runner with white stoneware and linen napkins. Store rolled in a fabric tube or drawer to avoid creases. Swap in seasonal greenery for holiday tables.
9. Chalk-Painted White Console Table
Chalk paint gives a velvety, matte White Home Decor finish that looks lived-in and elegant. A quick coat plus light distressing creates a vintage-modern piece that anchors an entryway or living room.
A chalk paint set simplifies color matching.
Ingredients
- Small wooden console table
- 1 pint chalk paint (white)
- 1/4 pint clear wax
- 1/8 pint dark wax (optional for antiquing)
- Sanding sponge (220 grit)
- Clean rags
- 1 angled brush
- Painter's tape
- Drop cloth
Instructions
- Clean table surface; remove hardware.
- Apply one thin coat of chalk paint using angled brush; let dry 1–2 hours.
- Apply second coat if needed for coverage.
- Lightly sand edges and corners for subtle distressing.
- Rub clear wax over painted surface with clean rag; buff to matte sheen.
- For depth, lightly apply dark wax to crevices and blend.
- Reattach hardware and style.
How to Serve It
Place beneath a mirror and add a small tray for keys. For extra protection, use a clear furniture protector pad under heavy decor. The table pairs well with natural fiber rugs and white ceramic accessories.
10. White Linen Curtains (No-Sew)
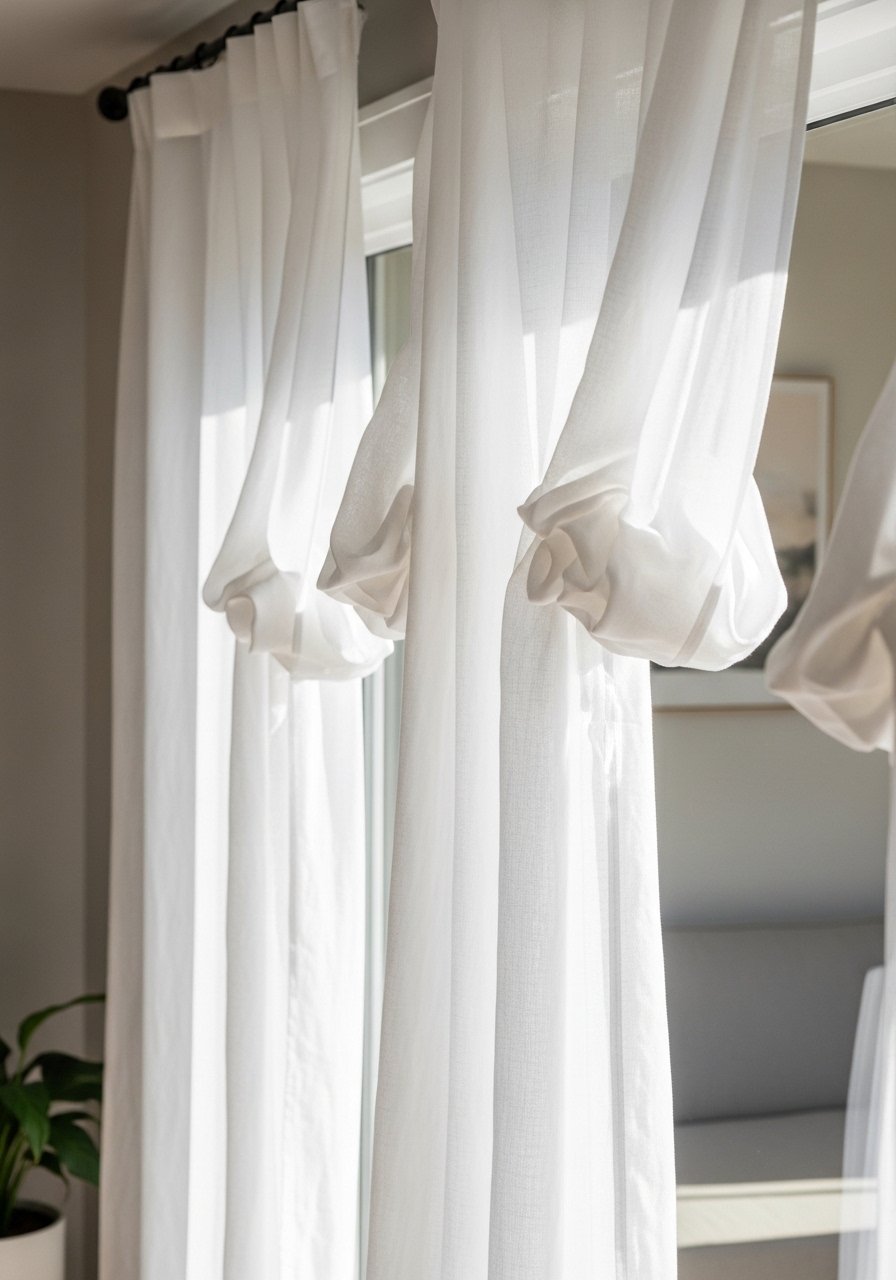
No-sew linen curtains are an easy update to let light in while keeping privacy. Hemming tape and a sharp iron give professional-looking results without a machine. The result is soft, textured White Home Decor that feels warm.
I recommend a heavy-duty curtain rod for smooth hanging.
Ingredients
- 6 yards pre-washed white linen fabric (for two panels)
- 2 rolls hemming tape (fusible)
- 2 curtain rings or grommets (optional)
- Measuring tape
- Fabric scissors
- Iron and ironing board
- Curtain rod and brackets
Instructions
- Measure window height and add 8–10 inches for header and floor clearance.
- Cut fabric to size for two panels.
- Fold bottom edge up 1/2 inch, press, fold again 1 inch, press, and apply fusible hemming tape per instructions.
- Repeat for side hems.
- Create header: fold top edge 3 inches, insert curtain rings or sew grommets if desired.
- Hang panels and adjust length to just kiss the floor or hover slightly above.
- Steam lightly to remove wrinkles.
How to Serve It
For a layered look, hang sheer panels behind linen curtains. Use a steamer to keep fabrics crisp. Curtains can be machine-washed on gentle cycle and re-hung damp to reduce ironing.
11. Whitewashed Headboard
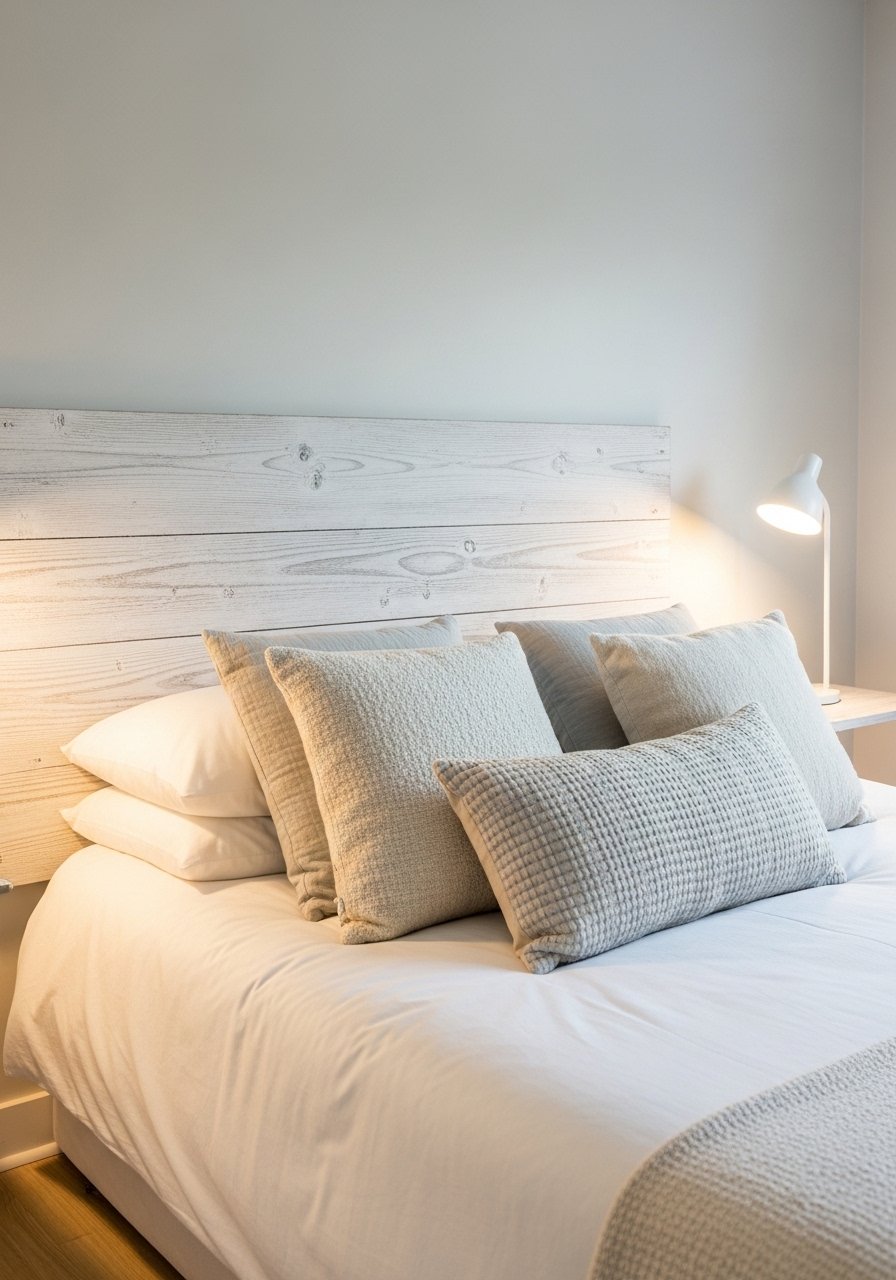
A whitewashed headboard brings a calm focal point to your bedroom while keeping the space bright. It’s forgiving—brush strokes and grain are part of the charm. This headboard pairs beautifully with layered white bedding.
A circular saw helps cut plywood neatly if making a custom panel.
Ingredients
- 1 sheet 3/4-inch plywood (full or cut to desired headboard size)
- 1 cup white latex paint
- 1/4 cup water
- 2 wood screws and wall anchors or headboard brackets
- Sanding block
- 1 small foam roller
- 2-inch paintbrush
- Measuring tape
- Drop cloth
Instructions
- Cut plywood to width desired (e.g., 60×36 inches for queen).
- Sand edges and surface lightly and wipe clean.
- Mix paint wash: 1 cup paint + 1/4 cup water.
- Apply wash with foam roller, working with grain; wipe with rag to achieve translucence.
- Let dry 1 hour; sand lightly for soft edges.
- Attach brackets to back and mount to wall studs, or use screws and anchors.
- Style bed with white linens and layered pillows.
How to Serve It
Add a pair of small wall sconces for reading. Protect mattress by leaving a small gap between headboard and wall if painting finishes off-gassed; allow 24 hours ventilation. For extra stability, use anti-tip furniture straps.
12. White Marble-Inspired Coasters
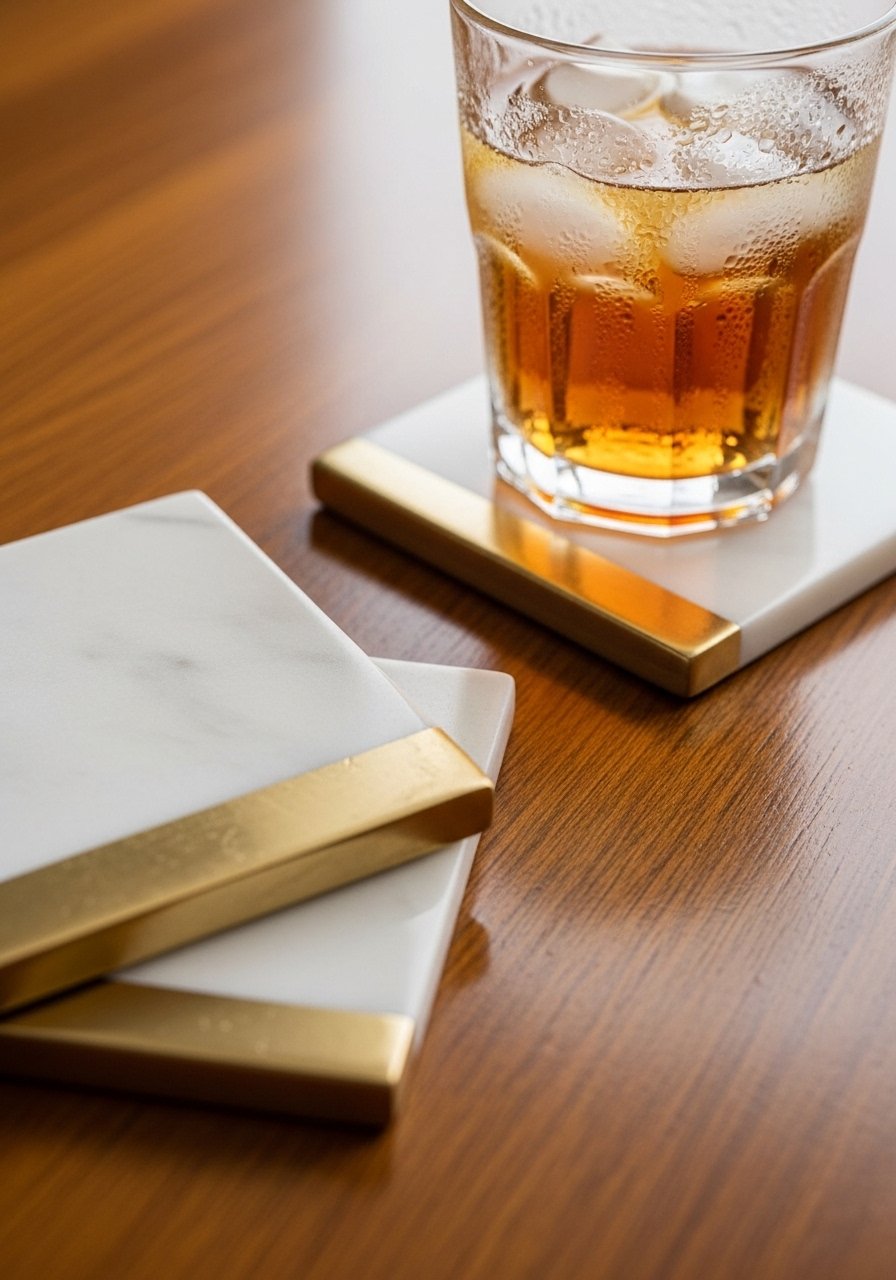
Marbled coasters give a luxe feel without the price tag. Using air-dry clay and a few paint techniques produces durable, absorbent coasters that complement White Home Decor and protect surfaces.
A silicone coaster mold keeps shapes even.
Ingredients
- 1 lb air-dry clay
- 1/4 cup white acrylic paint
- 2 tsp gray acrylic paint
- Gold leaf or gold acrylic paint (optional)
- Silicone coaster mold (round)
- Sandpaper (220 grit)
- Clear matte sealer spray
- Small sculpting tool or toothpick
- Water and damp cloth
Instructions
- Roll small pieces of clay in white; press into silicone mold evenly.
- Add a thin swirl of gray paint on surface and use toothpick to create marbling.
- Smooth edges and remove excess clay; let cure per product (usually 24–48 hours).
- Sand light imperfections with 220 grit.
- Paint gold dipped edge or apply gold leaf; seal with clear matte spray.
- Allow sealer to cure 24 hours before use.
- Test one coaster for water resistance before gifting.
How to Serve It
Display on a small marble tray near a couch or coffee table. Wipe coasters with damp cloth; avoid dishwasher. These make lovely housewarming gifts when boxed in tissue.
13. White Gallery Ledge
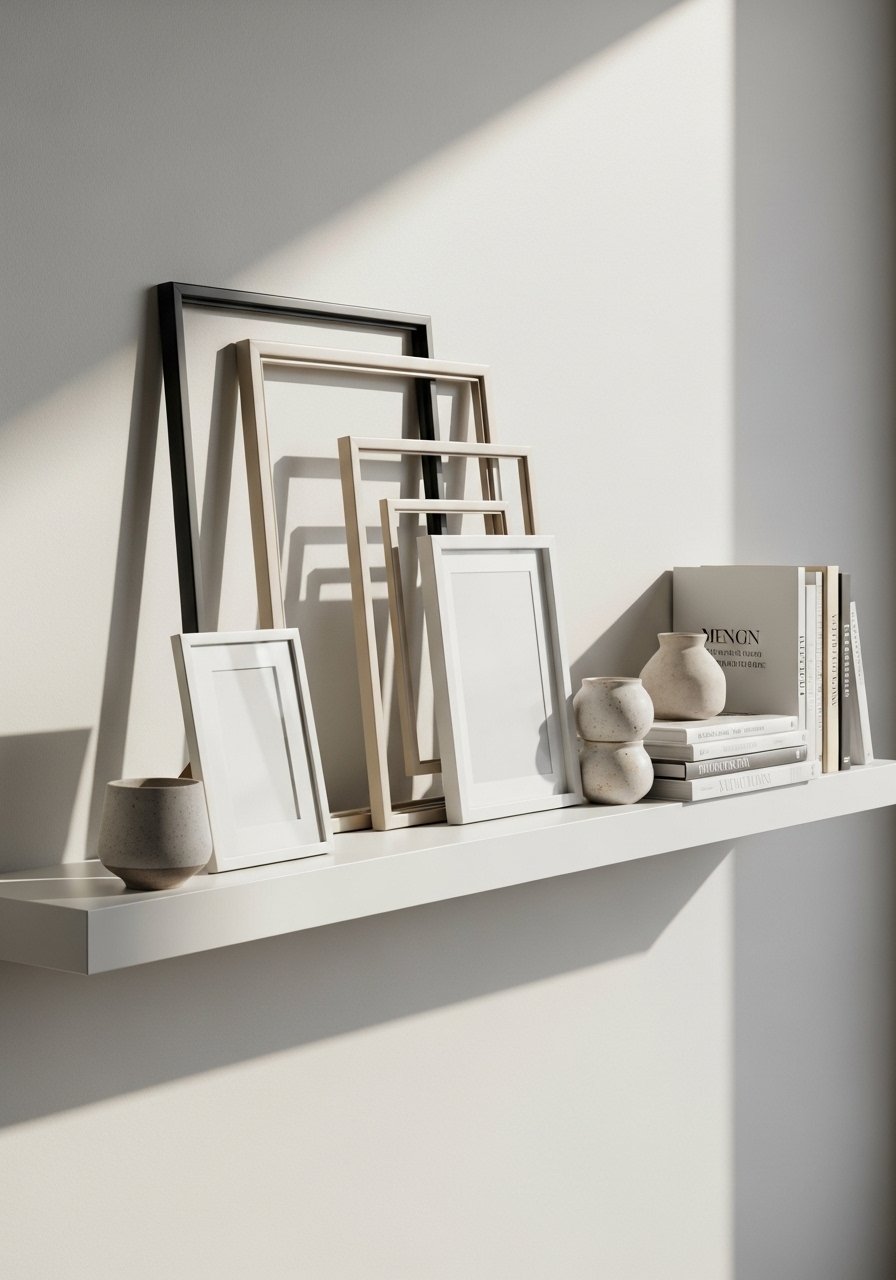
A gallery ledge lets you layer art and ceramics for a curated White Home Decor wall. It’s flexible—swap prints anytime without rehanging. Keeps the look casual and lived-in.
I mount ledges with a stud finder to ensure secure attachment.
Ingredients
- 1 picture ledge (48 inches, painted white)
- 4 mounting screws and anchors
- 3–6 small frames (matted black-and-white prints)
- 1 small ceramic vase
- 2 art books
- Level
- Stud finder
- Measuring tape
Instructions
- Decide height and use stud finder to locate studs.
- Mark level line and pre-drill holes for screws.
- Mount ledge securely; ensure level.
- Arrange frames and objects on floor to plan composition.
- Place larger frames at back and smaller items in front, slightly overlapping.
- Adjust until balanced; step back to confirm from across room.
- Change pieces seasonally for fresh feels.
How to Serve It
Layer a mix of textures—matte frames, gloss ceramic, small greenery. Use a felt pad kit under ceramics to prevent scratches. The ledge works well in dining rooms and hallways.
14. White Tile Backsplash Refresh
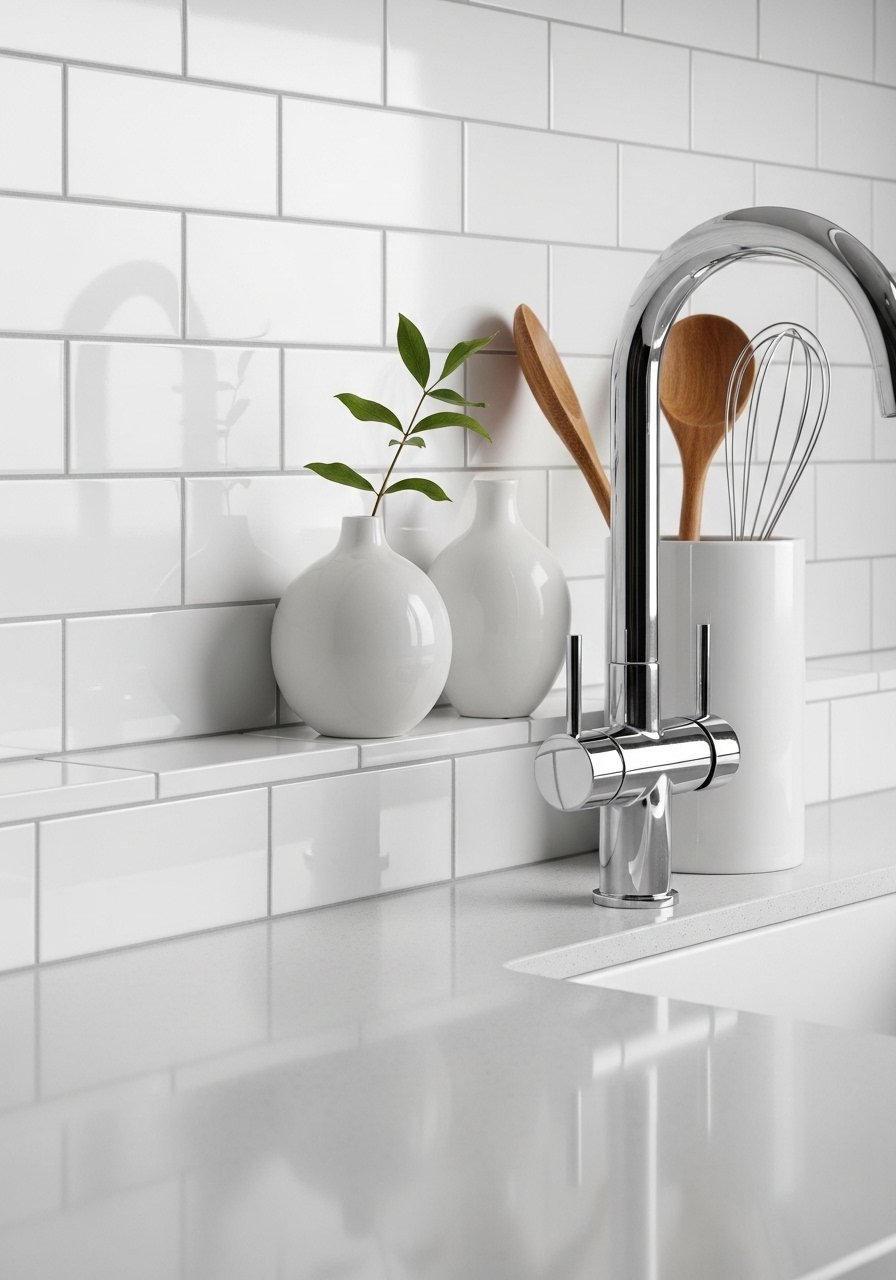
Refreshing grout and adding crisp white subway tile or peel-and-stick tile modernizes a kitchen without a full remodel. White tile brightens backsplashes and reflects light for a fresh kitchen look.
For peel-and-stick, a tiling roller helps secure edges.
Ingredients
- White subway tiles or peel-and-stick tile (enough for backsplash area)
- Grout (if placing real tile) — white or warm gray
- Tile adhesive (thinset) or peel-and-stick backing
- Notched trowel (if using thinset)
- Grout float and sponge
- Tile spacers
- Painter's tape
- Level
- Tiling roller (for peel-and-stick)
Instructions
- Clean and degrease backsplash surface thoroughly.
- If using real tile, spread thinset with notched trowel and press tiles, using spacers.
- Allow thinset to cure per package (24 hours), then grout with float and wipe sponge.
- For peel-and-stick, measure and cut tiles to fit; peel backing and press onto surface, smoothing with tiling roller.
- Seal grout if needed and wipe clean.
- Reinstall outlet covers and hardware when fully dry.
- Style counter with white canisters or a wood cutting board.
How to Serve It
Keep counter clutter minimal—store utensils in a white crock for cohesion. For easy cleaning, wipe tiles with warm water and mild soap. Peel-and-stick is a great rental-friendly option.
15. White Ceramic Pendant Light (Painted)
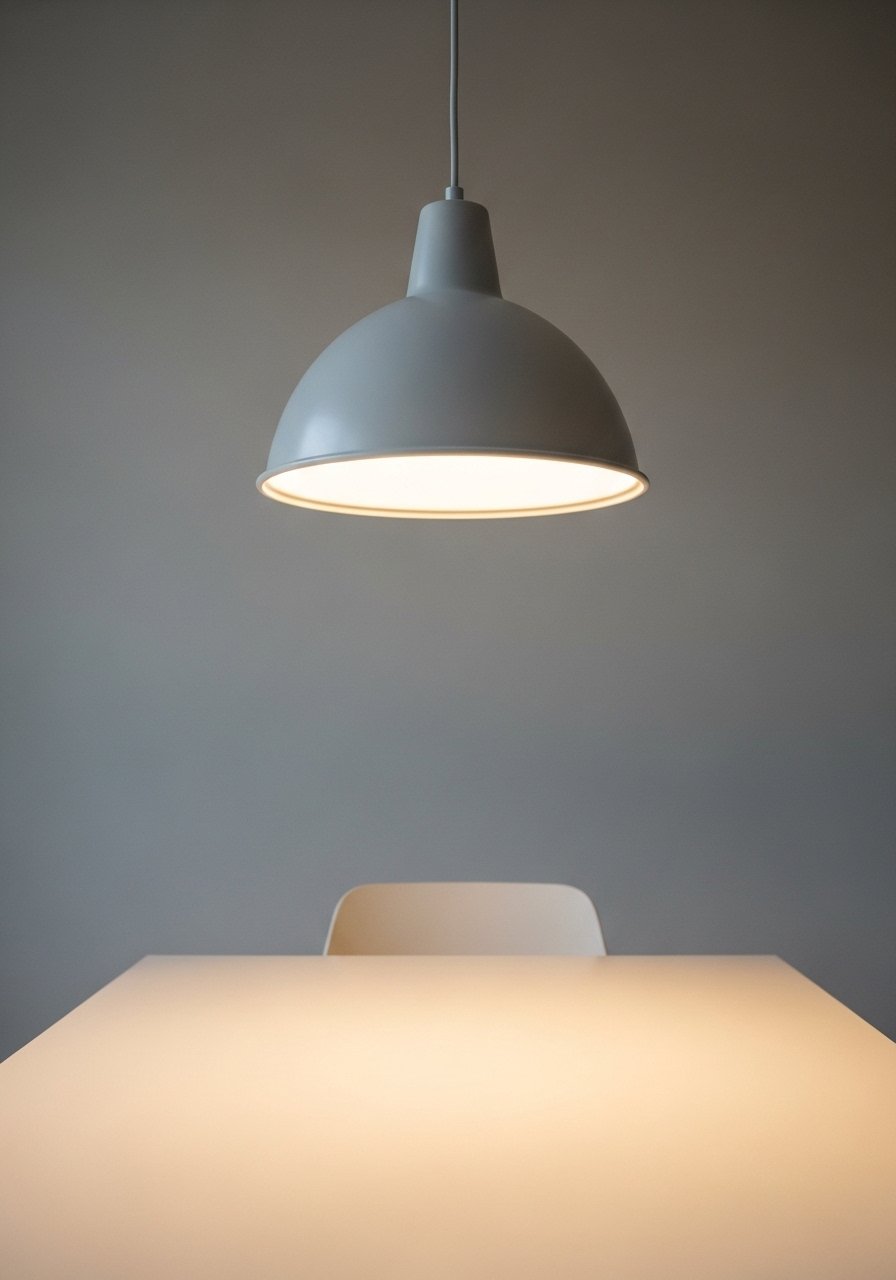
Updating a pendant with white paint refreshes lighting fixtures to match clean White Home Decor schemes. Matte white softens the metal and creates a cozy glow.
Use a spray paint designed for metal for even coverage.
Ingredients
- Existing pendant lamp or thrifted metal shade
- 1 can spray paint for metal (matte white)
- Painter's tape
- Drop cloths or cardboard
- Screwdriver for disassembly
- Extra bulbs (warm 2700K recommended)
- Safety goggles and mask
Instructions
- Turn off power and remove shade per manufacturer instructions.
- Disassemble and remove bulb; tape off socket and wiring areas with painter's tape.
- Work outdoors or in ventilated area; lay shade on cardboard.
- Apply thin coats of spray paint, 2-3 passes, holding can 8–10 inches away. Let dry 15–20 minutes between coats.
- Reassemble and reinstall fixture, ensuring all electrical work follows code.
- Use a warm bulb (2700K–3000K) to keep light cozy.
- Step back and admire the soft, modern glow.
How to Serve It
Pair with a white or neutral lampshade or leave bare for a modern look. Use diffused bulbs for softer light. Keep a spare bulb in a bulb organizer drawer for quick swaps.
16. White Rope-Wrapped Vases
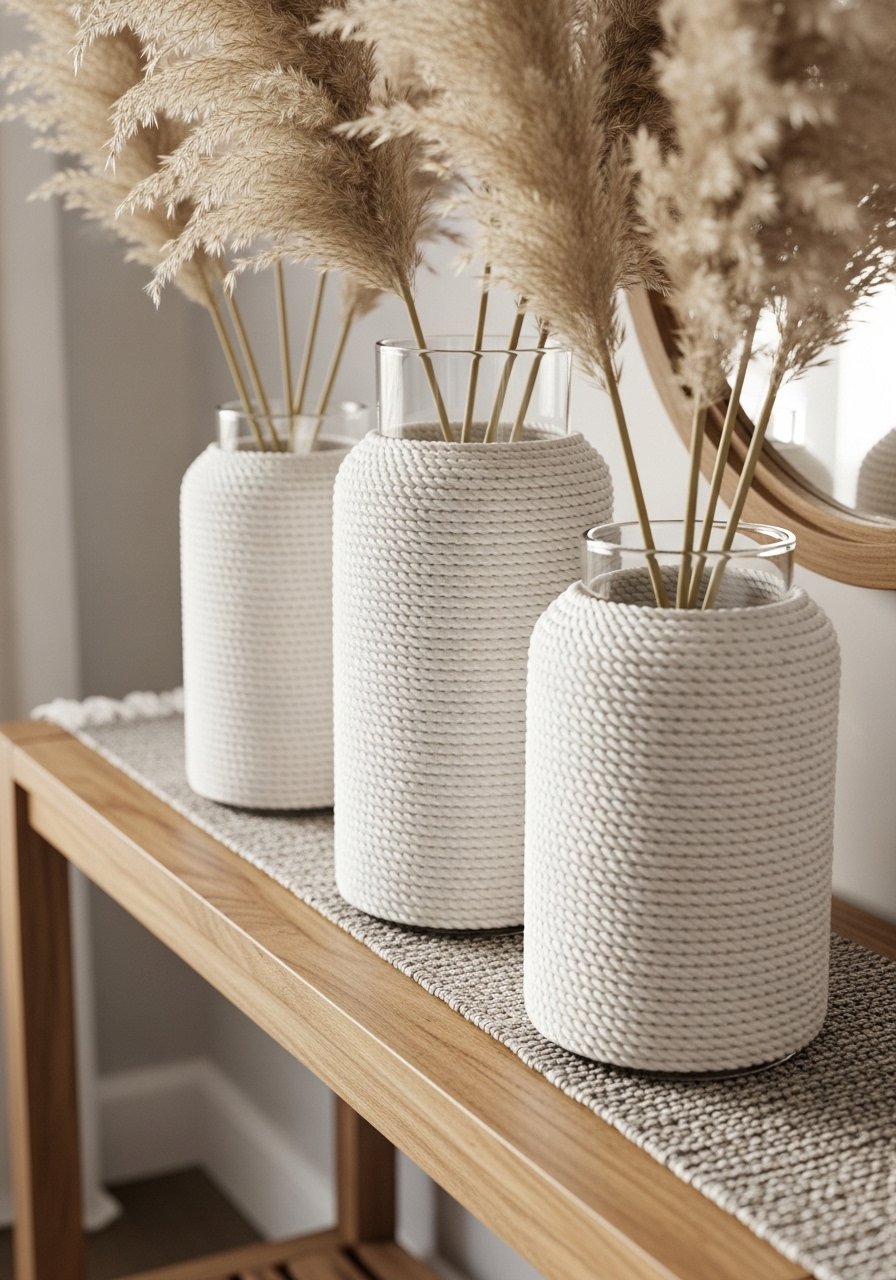
Wrapping vases in white rope gives sculptural shape and a coastal texture that reads clean and cozy. Use clear glass or thrifted vases to create unique shapes that work across styles.
A hot glue gun secures rope quickly.
Ingredients
- 2 tall glass vases
- 50–100 feet white cotton rope (3/8 inch)
- Hot glue sticks
- Hot glue gun
- Scissors
- Ruler
- Small felt pads
Instructions
- Heat glue gun and keep glue stick ready.
- Starting at base, apply a dot of hot glue and press rope; hold for 5–10 seconds.
- Wrap rope tightly in a spiral, adding glue every 2–3 inches for security.
- Continue until top is reached; trim rope and tuck end under previous wrap with glue.
- Add felt pads to bottom to protect surfaces.
- Fill with dried stems like pampas grass or fresh eucalyptus as desired.
- Wipe glass before wrapping to ensure no glue shows.
How to Serve It
Group with other white or natural objects and place on a console or windowsill. For easy cleaning, use dried stems rather than water-filled arrangements. Store vases in a protective box when not in use.
17. White Minimal Desk Organizer

A simple white desk organizer keeps supplies tidy and reduces visual clutter—key to fresh White Home Decor. Painted wood compartments look custom and fit your desk’s exact needs.
A compact drill driver is handy for assembling small compartments.
Ingredients
- 1 small wooden organizer kit or scrap wood pieces
- 1/2 cup white craft paint
- Sanding sponge
- Wood glue
- 4 small finishing nails
- Paintbrush
- Measuring tape
- Pencil
- Felt pads
Instructions
- Cut wood to desired compartment sizes or use kit pieces.
- Sand edges and assemble with wood glue and finishing nails; let dry 1 hour.
- Fill nail holes and sand smooth.
- Paint two thin coats white; dry 30–60 minutes between coats.
- Attach felt pads to bottom.
- Arrange pens, sticky notes, and chargers in compartments.
- Tidy and wipe dust weekly.
How to Serve It
Keep only daily essentials in the organizer for a minimalist desk. Pair with a white ceramic mug for extra pens or a small desk tray for paperclips. Use cable clips to route cords neatly.
18. White Painted Woven Basket
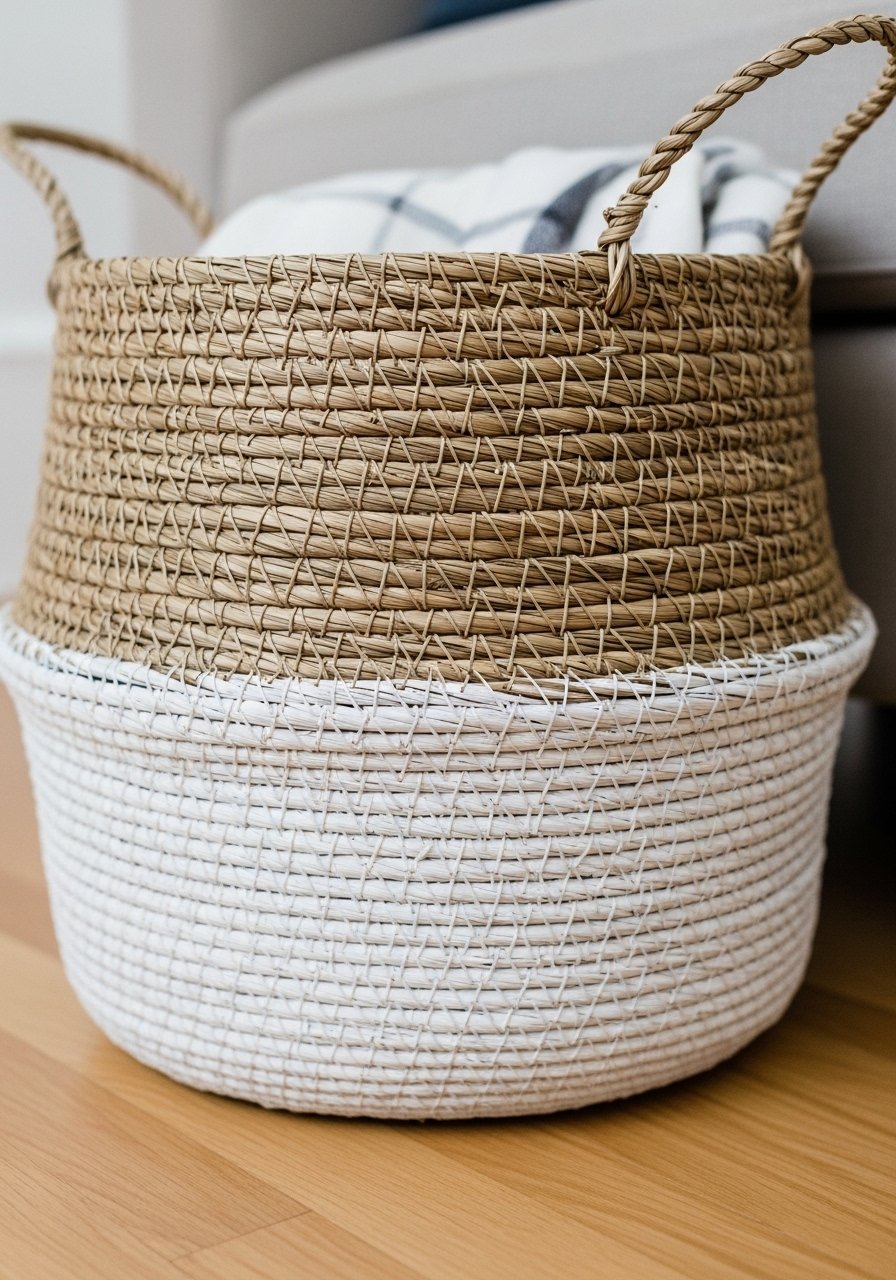
Dip-painting baskets in white gives them a modern, coastal vibe while preserving natural texture. They’re functional for blankets and toys while blending into clean White Home Decor schemes.
Use a rubber glove pair while painting to avoid drips on hands.
Ingredients
- 1 medium woven basket (seagrass or rattan)
- 1/2 cup white latex paint
- 1/4 cup water
- Paint tray
- Foam brush
- Drop cloth
- Painter's tape (optional for straight line)
- Soft cloth for wiping
Instructions
- Lay drop cloth and set basket on its side.
- Mix paint and water for a semi-transparent wash.
- Dip brush and apply paint to lower half of basket for dip-dye effect; wipe excess for gradient.
- Rotate basket to keep edge level; allow to dry 30–45 minutes.
- Add second light coat if needed; let cure 2 hours before use.
- Use for blankets, magazines, or as a planter cover (with saucer).
How to Serve It
Place by sofa or in a bathroom to hold towels. For indoor plants, set the pot in a plastic liner inside the basket. Fold throws neatly inside and keep it near a seating area for cozy reach.
19. White Painted Door Trim

Refreshing door trim with bright white paint instantly sharpens a room’s lines. Crisp trim is an effortless White Home Decor upgrade that frames your spaces.
Use a multi-angle trim brush for clean edges.
Ingredients
- 1 quart high-quality trim paint (semi-gloss white)
- Painter's tape
- Drop cloths
- 2-inch angled trim brush
- Fine-grit sanding block
- Tack cloth
- Putty for nail holes
Instructions
- Lay drop cloths and tape off wall edges with painter's tape.
- Fill nail holes and sand lightly; wipe with tack cloth.
- Apply first thin coat of trim paint with angled brush; maintain steady strokes.
- Let dry 2–4 hours, lightly sand between coats if needed.
- Apply second coat for full coverage.
- Remove tape at a 45-degree angle while paint is still slightly tacky to avoid peeling.
- Clean brushes per paint instructions.
How to Serve It
Bright white trim pairs with soft wall colors for contrast. Keep extra paint for touch-ups in a small paint storage container. This small update refreshes the whole room’s look.
20. White Waffle Weave Bath Towels (DIY Tassels)
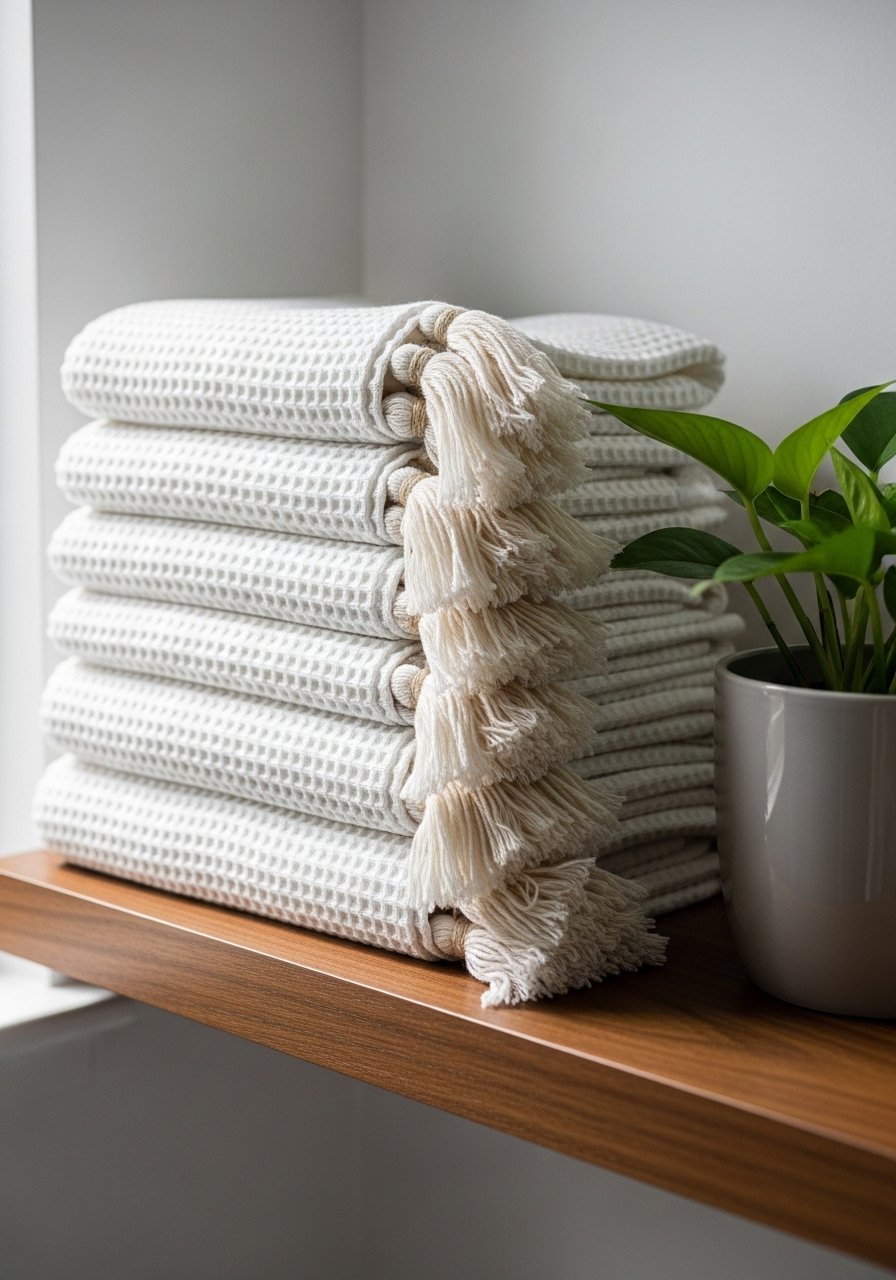
Adding handmade tassels to plain white waffle towels personalizes bathroom linens while keeping the clean White Home Decor aesthetic. Tassels are simple to attach and add a subtle artisanal detail.
A yarn needle set helps attach tassels neatly.
Ingredients
- 4 white waffle weave bath towels
- 2 skeins of white cotton yarn
- 1 small pair scissors
- 1 yarn needle
- Measuring tape
- Small cardboard rectangle for tassels
- Fabric glue (optional)
Instructions
- Wrap yarn around cardboard (3–4 inches width) about 20 times; slide off and tie at one end to form tassel head.
- Cut opposite loops to create fringe; trim evenly.
- Attach tassel to towel corner with yarn needle or a few stitches; knot securely and hide ends inside.
- Repeat for each towel corner.
- Trim tassels to same length for uniform look.
- Wash towels on gentle cycle before first use to soften yarn.
- Fluff tassels after washing to maintain shape.
How to Serve It
Stack towels in a neat pile on an open shelf or roll them in a basket beside the tub. Use a towel ladder for display. These towels make for a cozy spa-like vibe.
21. White Painted Accent Chair
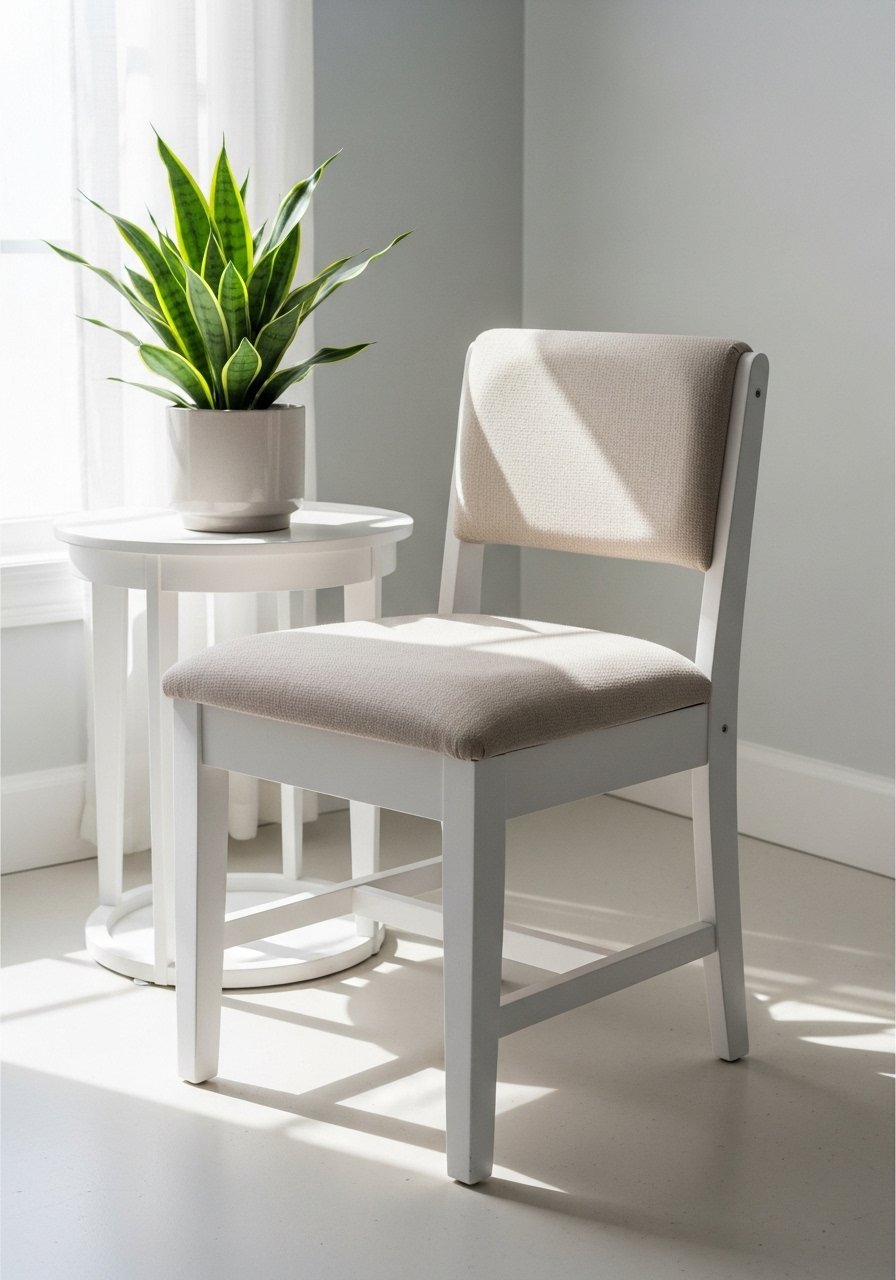
Painting an accent chair white updates a thrifted find into a chic piece that complements White Home Decor. Pair with neutral upholstery for a cohesive look. The painted finish brightens corners and works in bedrooms or nooks.
A sanding block and tack cloth set helps prep surfaces.
Ingredients
- 1 wooden accent chair (solid)
- 1 pint chalk or furniture paint (white)
- 1/4 pint clear wax or polyurethane (matte)
- Sandpaper (120 and 220 grit)
- Clean rags
- Painter's tape
- Drop cloth
- Screwdriver to remove seat if upholstered
Instructions
- Remove seat cushion and hardware; sand chair to remove gloss.
- Wipe down and prime lightly if wood is very dark.
- Apply two thin coats of chalk or furniture paint, allowing 1–2 hours to dry between coats.
- Lightly sand edges for a subtle worn look if desired.
- Apply clear wax or matte polyurethane and buff when dry.
- Reattach cushion and place chair in chosen spot.
- Add a small lumbar pillow in linen for comfort.
How to Serve It
Use as a bedroom accent or occasional dining chair. Protect floors with felt pads under legs. For long-term care, wipe with damp microfiber cloth. The chair pairs beautifully with a decorative lumbar pillow.
22. White Painted Floor Lamp Base
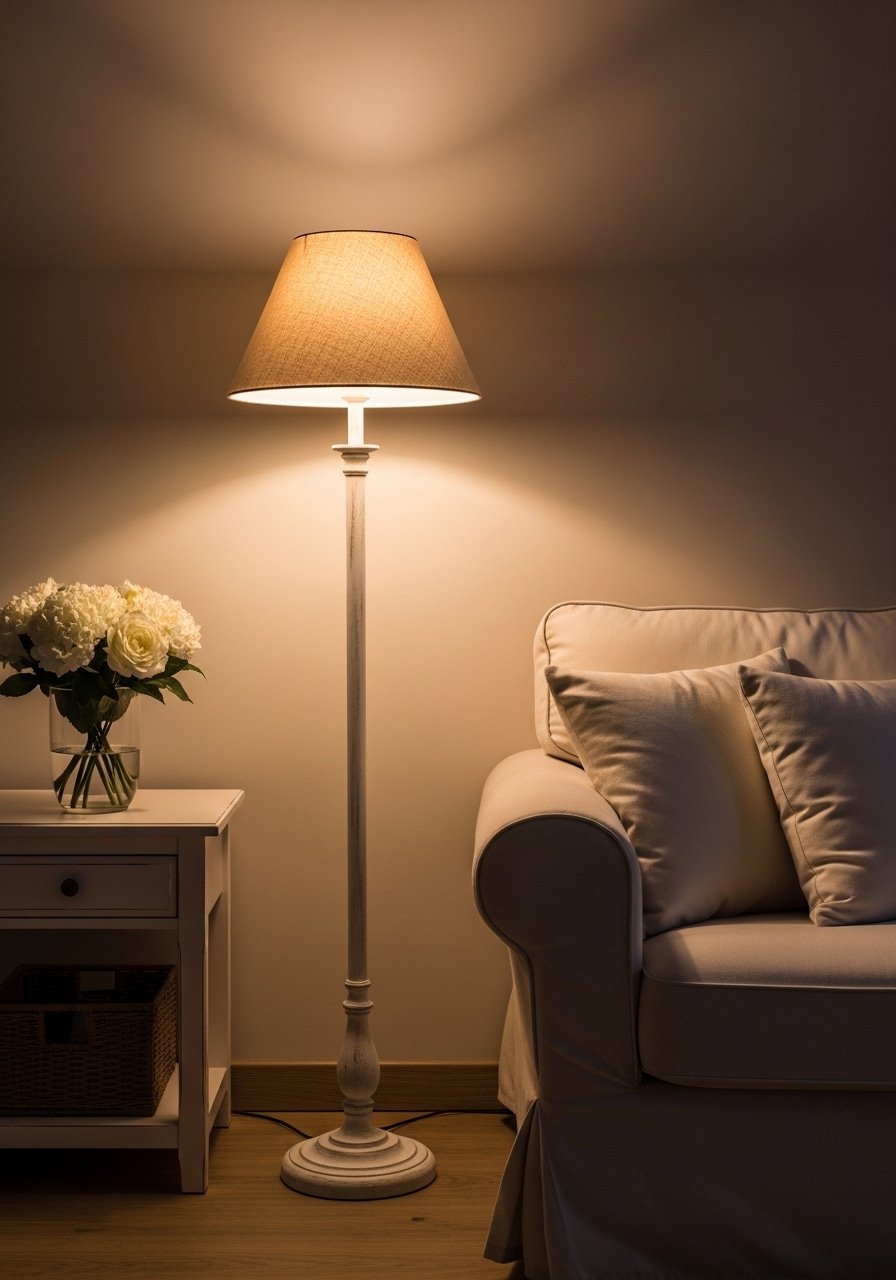
Painting a lamp base white refreshes lighting without replacing the whole fixture. It harmonizes with White Home Decor and updates metal finishes that clash with a soft palette. Keep the shade neutral to maintain a warm glow.
Use a spray paint for metal and mask electrical parts.
Ingredients
- Floor lamp base (metal or wood)
- 1 can metal spray paint (matte white)
- Painter's tape
- Drop cloth and cardboard
- Screwdriver to remove shade and bulb
- Sanding sponge (fine grit)
- New bulb (warm LED recommended)
Instructions
- Unplug lamp and remove shade and bulb.
- Tape off socket and wiring and lay lamp on cardboard.
- Sand lightly to scuff surface for paint adhesion.
- Apply several thin coats of spray paint, 15–20 minutes between coats.
- Let cure 24 hours before reassembling and plugging in.
- Use warm LED bulb (2700K) to preserve cozy lighting.
- Place next to seating and adjust height for reading.
How to Serve It
Pair with a linen or woven shade for texture. Use a smart bulb to adjust warmth and dimness. White lamp bases work well against pale walls for subtle contrast.
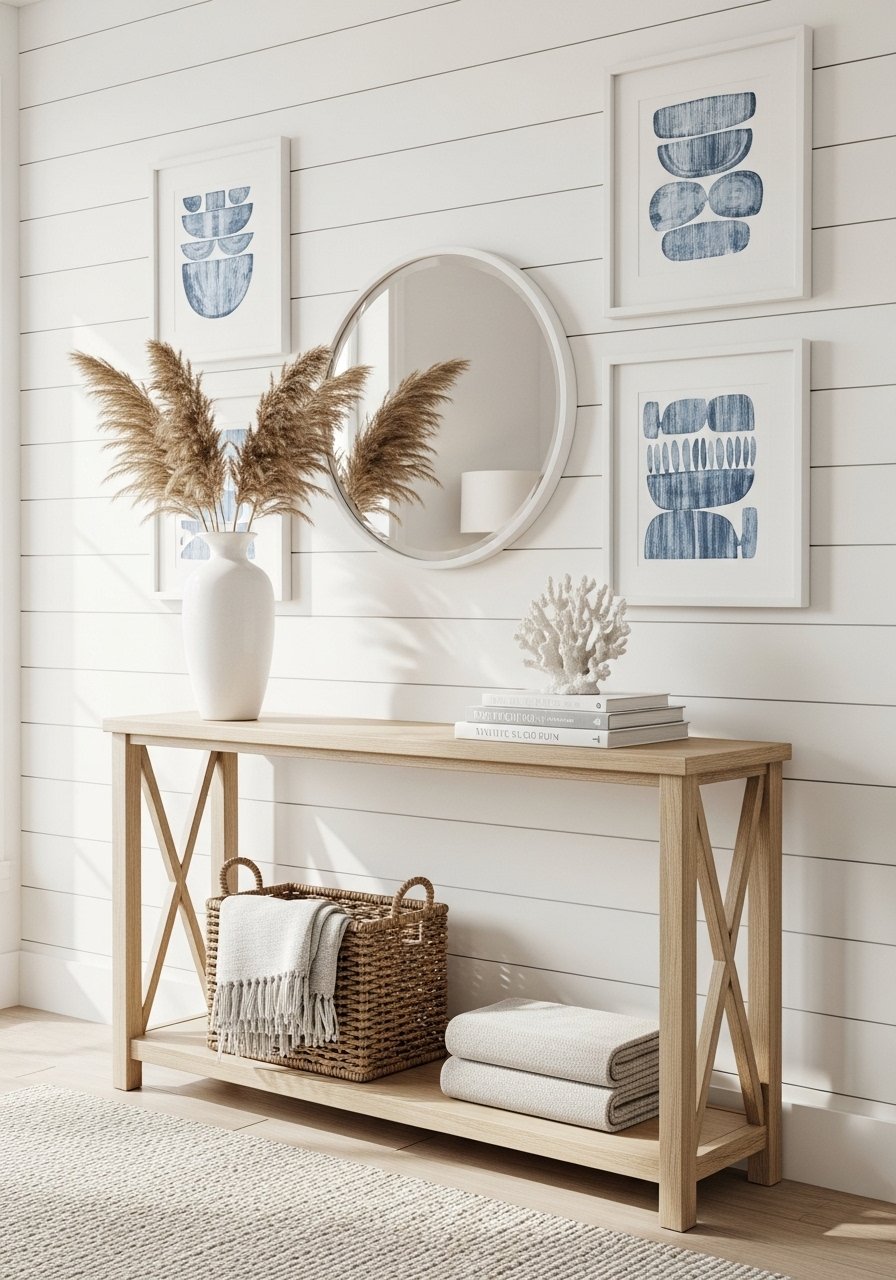
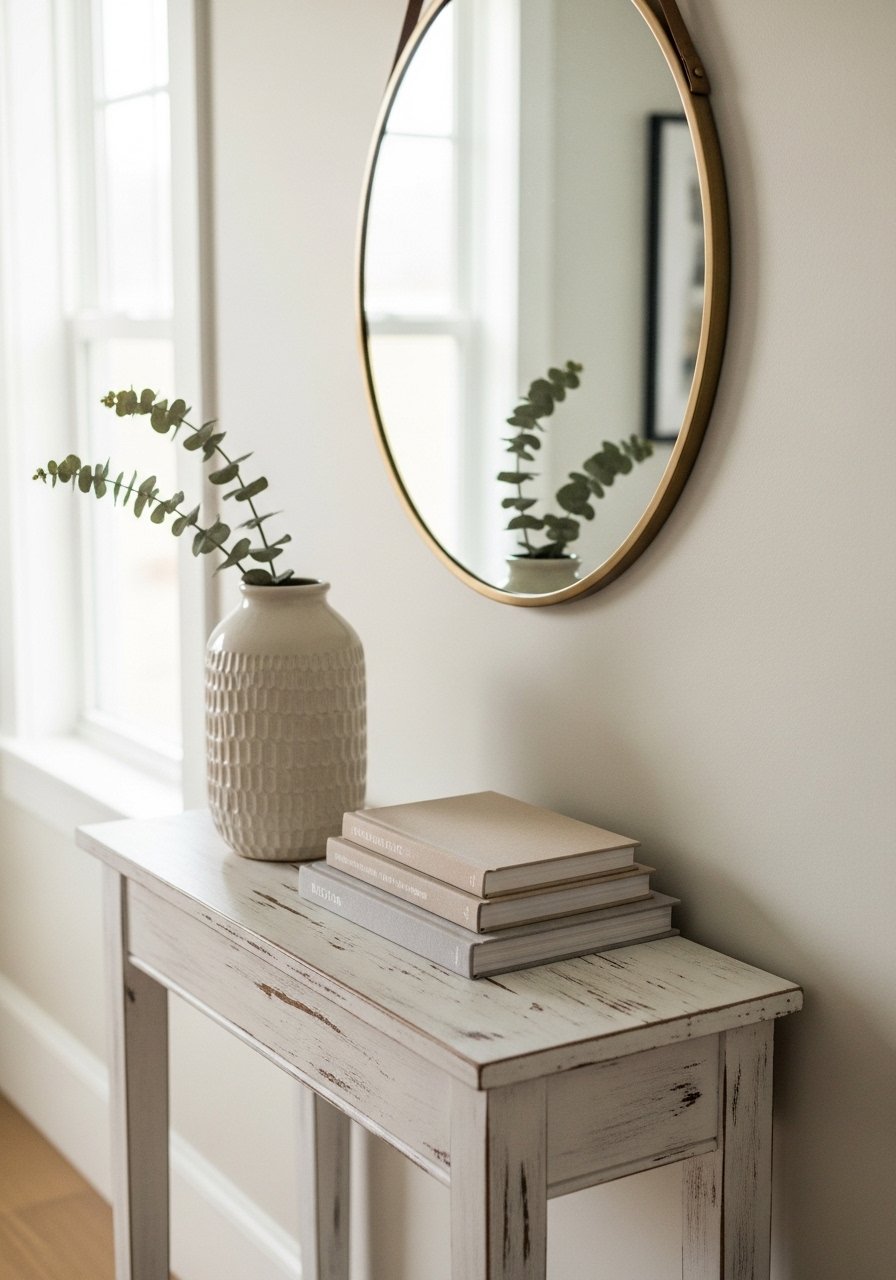
23. White Minimal Entryway Catch-All
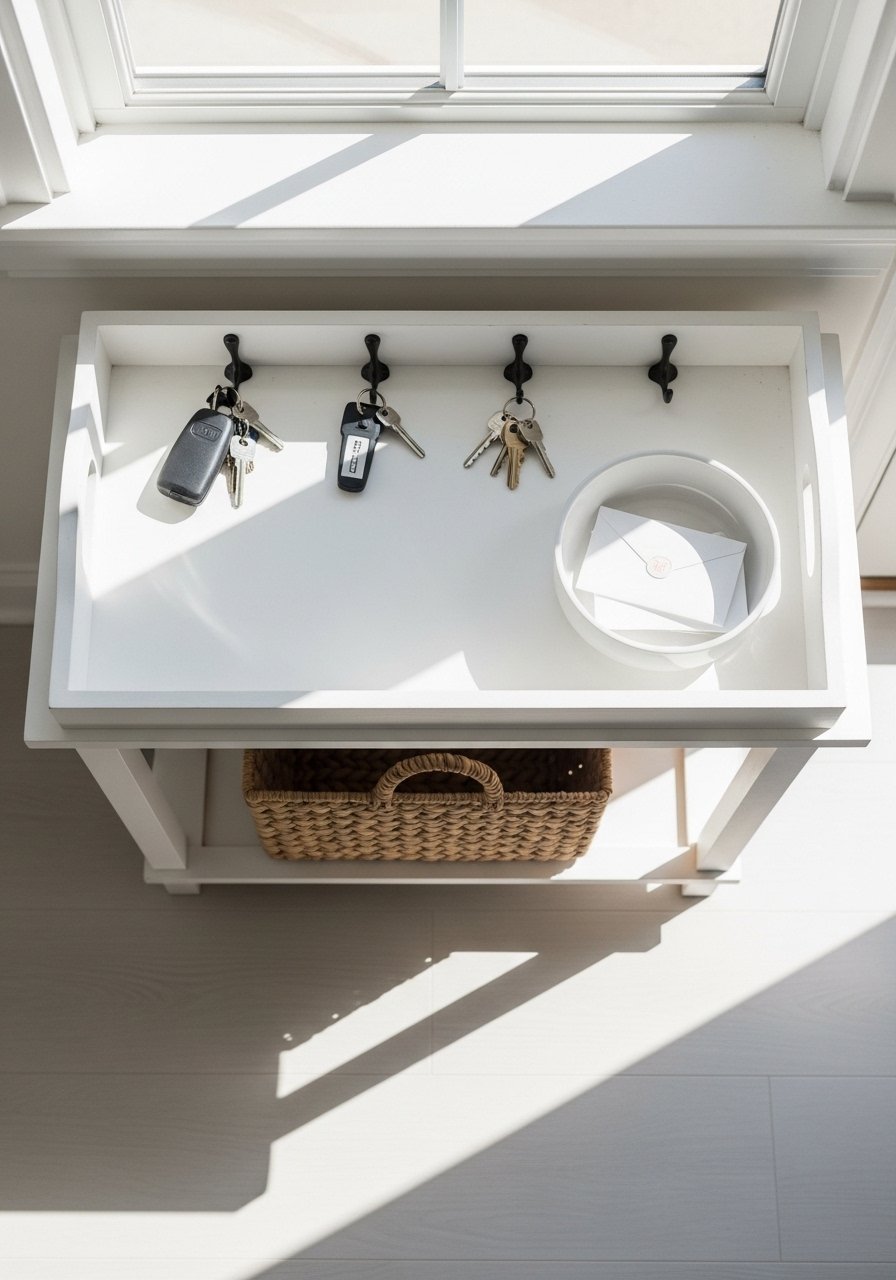
Create a tidy entry vignette with white-painted catch-alls that reduce clutter while keeping the first impression light. This setup includes a tray, a bowl, and a small hook rail for essentials.
I use a key hook rail for easy hanging.
Ingredients
- Small console table or floating shelf (white or painted)
- 1 wooden tray (painted white)
- 1 ceramic bowl (white)
- 1 small woven basket
- 1 key hook rail
- 4 small adhesive wall hooks
- 1 entryway rug (neutral)
- 1 small mirror (optional)
- Measuring tape
- Screwdriver
Instructions
- Position console or shelf by the door; measure for balanced placement.
- Mount key hook rail at comfortable height (about 5–5.5 feet).
- Place painted tray and ceramic bowl on surface to corral mail and sunglasses.
- Place woven basket underneath for shoes or bags.
- Add small mirror above console for last-minute checks.
- Keep rug in front of door to trap dirt and define the space.
- Tidy bowl daily and empty basket weekly.
How to Serve It
Use a mail organizer inside the tray for bills and incoming mail. Keep a small decorative hook for a dog leash or reusable bag. This entry setup makes coming and going feel calm and organized.
You’ve now got 23 White Home Decor “recipes” to mix, match, and try at home. They cover quick updates, small DIY builds, and simple styling moves that keep spaces feeling fresh and calm. Pin your favorites so you can return when you’re ready to start a project, and share a before-and-after with friends — which space are you updating first? If you’re investing in one tool that helps across many projects, a reliable detail paint brush set keeps edges crisp and finishes clean.
Happy styling — I can help you pick which project fits your space if you want to tell me what room you're tackling next.