You want your bedroom to feel like a calm retreat the moment you step in. Neutral Bedroom Decor helps you get there by focusing on texture, light, and simple palettes that calm the mind and improve sleep. This list gives you 25 "recipes"—step-by-step styling ideas—that mix fabrics, lighting, and layout to make your room softer and more restful.
Each idea includes a short shopping-style ingredients list and clear instructions, so you can style it today. Grab a soft linen duvet—try my favorite linen duvet cover for breathable comfort—and a fabric steamer to smooth wrinkles for that relaxed, polished look. You’ll find product tips sprinkled through each recipe so you can shop with confidence and style faster.
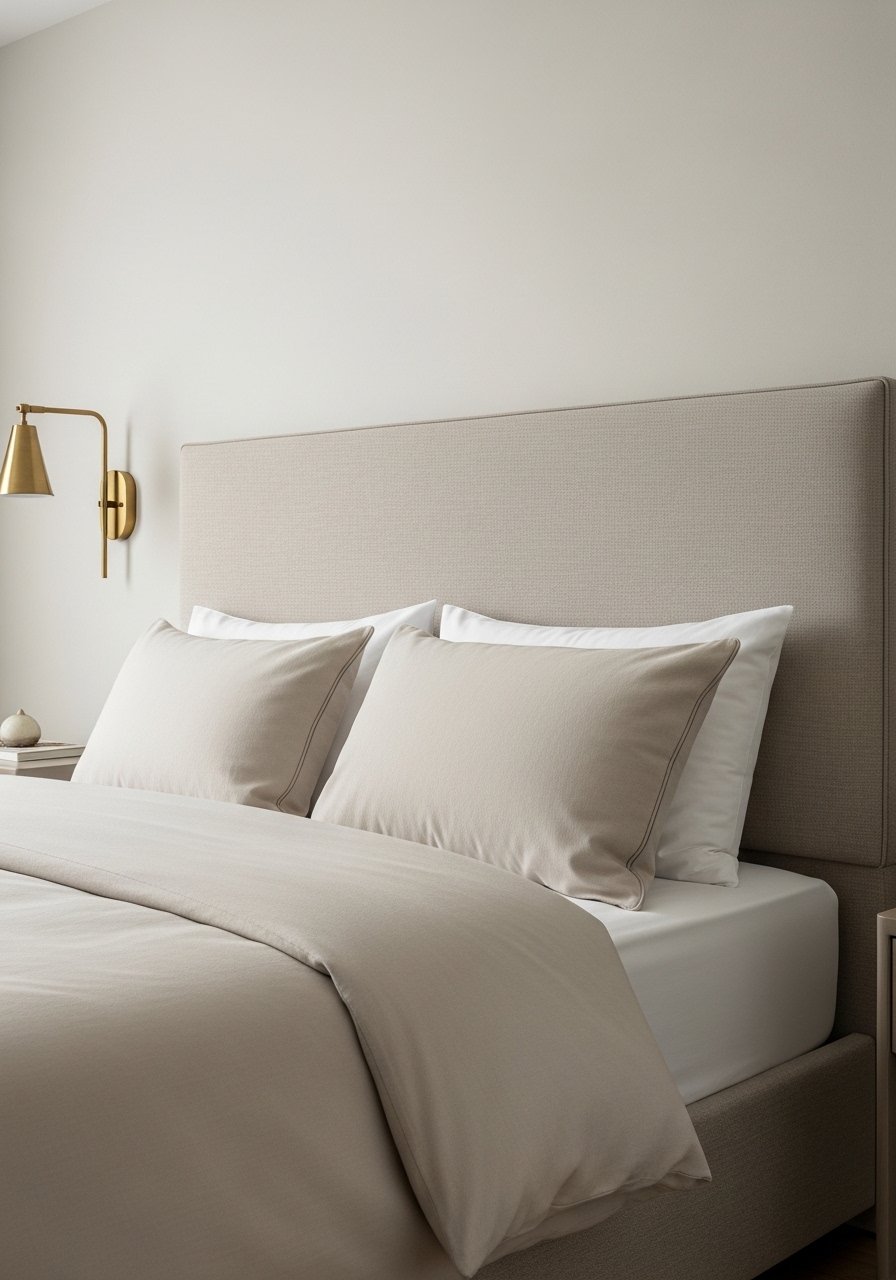
1. Linen Layering Recipe for a Calm Bed
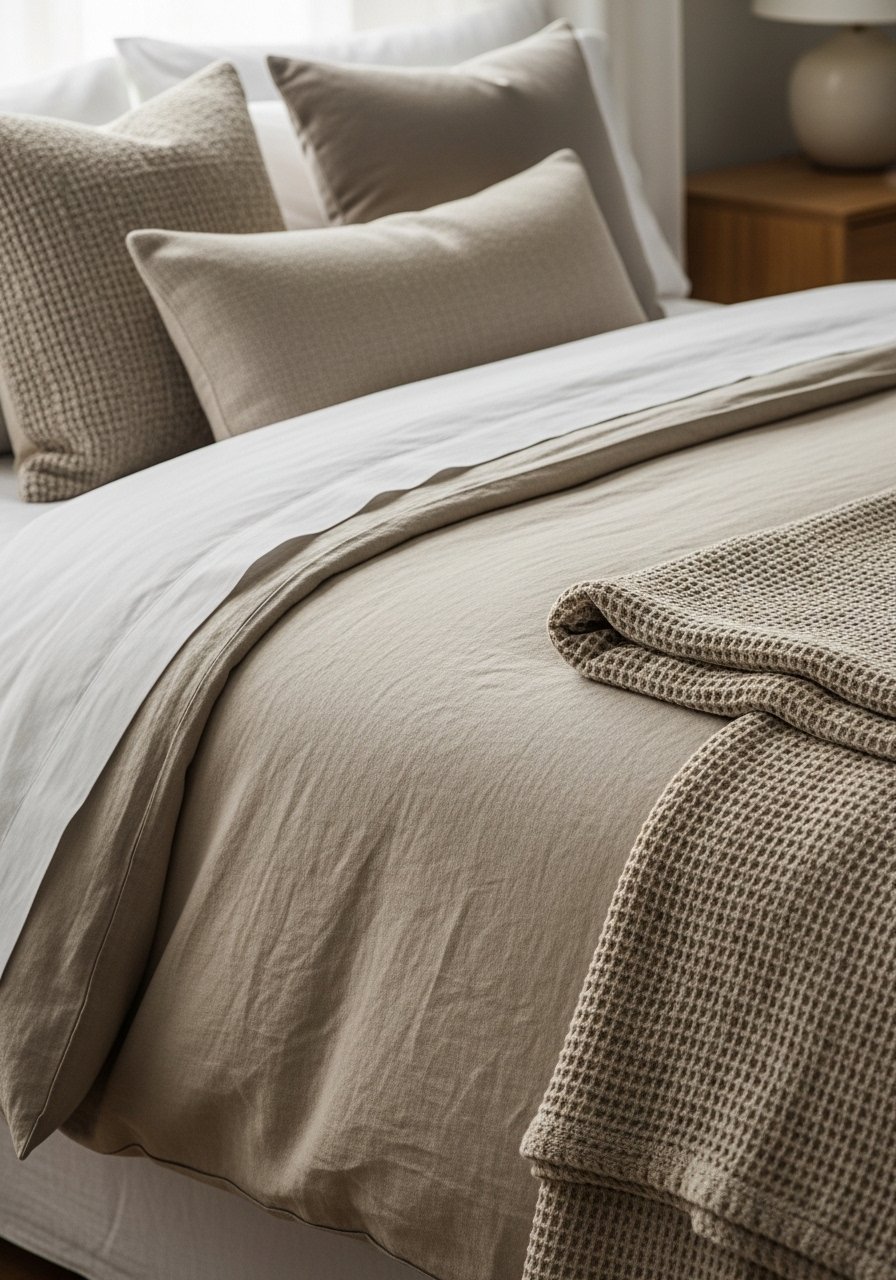
This is the classic soft neutral bed that feels like a hug. Linen gives a lived-in look with breathable texture and a soft matte finish. The trick is mixing smooth cottons with slubby linen and a knitted throw for tactile contrast. Anyone who loves simple comfort will appreciate the soft, earthy scent and natural feel.
Ingredients
- 1 king or queen linen duvet cover (washed, soft)
- 1 fitted cotton sheet set (breathable, per size)
- 1 lightweight cotton top sheet
- 2 standard pillowcases (cotton)
- 2 euro shams (linen)
- 2 decorative throw pillows (neutral tones)
- 1 waffle or knit throw blanket (folded)
- 1 bed skirt or platform cover (optional)
- 1 fabric steamer or iron (for smoothing)
- 1 duvet insert (medium loft)
Instructions
- Strip the bed and launder sheets and duvet cover according to labels.
- Insert the duvet into the linen cover and shake to distribute fill evenly.
- Make the bed with the fitted sheet, then the top sheet folded down 6 inches.
- Lay the duvet straight across the mattress, leaving a soft tuck at the foot.
- Place the euro shams against the headboard, then standard pillows in front.
- Arrange two decorative pillows and fold the knit throw at the foot.
- Smooth visible wrinkles with a fabric steamer for a relaxed look.
- Step back and adjust so textures are balanced left to right.
How to Serve It
- Present the bed with the throw off-center for casual symmetry.
- Garnish with a sprig of eucalyptus on the nightstand in a small vase.
- Pair with a soft bedside lamp and dimmer plug to set low light.
- Store extra throws in a woven basket at the foot for easy access.
- Make-ahead: launder and steam linens the night before guests arrive.
- For long-term freshness, rotate your duvet insert every 6 months and use a mattress protector.
2. Minimal Nightstand “Recipe” for Clutter-Free Sleep

A calm bedside helps you wind down faster. This minimal nightstand recipe pares down surfaces so your brain gets a restful signal. Focus on a single light source and one personal item. Nightstands like this help you sleep by reducing visual clutter.
Ingredients
- 1 small nightstand (natural wood)
- 1 ceramic bedside lamp (soft warm bulb)
- 1 white noise machine (simple controls)
- 1 small tray or dish (for jewelry)
- 1 bedside notebook and pen
- 1 low-scent candle (optional)
- 1 coaster (for water)
- 1 small plant or faux sprig
- 1 bedtime book (paperback)
- 1 cord organizer or clip
Instructions
- Clear everything off your current nightstand and wipe surface clean.
- Position the lamp so it provides warm, indirect light when seated.
- Place the white noise machine at ear height, about 2-3 feet from the bed.
- Add a tray to corral small items like rings and hair ties.
- Keep only the current book and a notebook—store extras in a drawer.
- Use a cord organizer to tuck away charging cables.
- Light the candle only 10–15 minutes before bed if you use one.
- Declutter weekly—remove anything extraneous to maintain calm.
How to Serve It
- Turn the lamp on at a low setting for 30 minutes before bed.
- Keep a glass of water on a coaster to avoid rings.
- Keep the white noise on a soft loop; use an overnight timer plug if desired.
- Store backup chargers in a drawer or basket out of sight.
- Swap decor seasonally to keep the look fresh without crowding.
3. Blackout Curtain Recipe for Deep Sleep

Blocking light can dramatically improve sleep quality. This blackout curtain recipe uses floor-to-ceiling panels for a cocoon effect without darkening the decor. The fabric choice and hardware keep the look soft and modern. Great for light sleepers and daytime nappers.
Ingredients
- 2 blackout curtain panels (floor-to-ceiling length)
- 1 coordinating sheer panel (optional)
- 1 heavy-duty curtain rod (correct length)
- 8–12 curtain rings or grommets (per rod)
- 4 mounting brackets and anchors
- 1 tape measure
- 1 step ladder
- 1 set of ready-made tiebacks or rope
- 1 sewing kit or fabric clips (for hemming)
- 1 black-out lining (if panels are unlined)
Instructions
- Measure from ceiling to floor for panel length; add 2 inches for hemming.
- Install the rod brackets into studs or use anchors at the correct height.
- Mount the rod so panels just skim the floor for a tailored look.
- Attach blackout panels to rings or slide grommets onto the rod.
- Layer sheers behind for daytime softness, if using.
- Pull panels closed and ensure they overlap in the center to avoid light gaps.
- Use tiebacks to frame the window during the day.
- For a polished finish, press hems with a fabric steamer.
How to Serve It
- Close curtains 30 minutes before bedtime to dim the room gradually.
- Pair with a lightweight sleep mask for full darkness if needed.
- Store extra tiebacks in a drawer; use velcro cable straps to bundle cords.
- Seasonal tip: switch to lighter fabrics in summer for airflow.
4. Texture Mix “Recipe” with Rugs and Throws
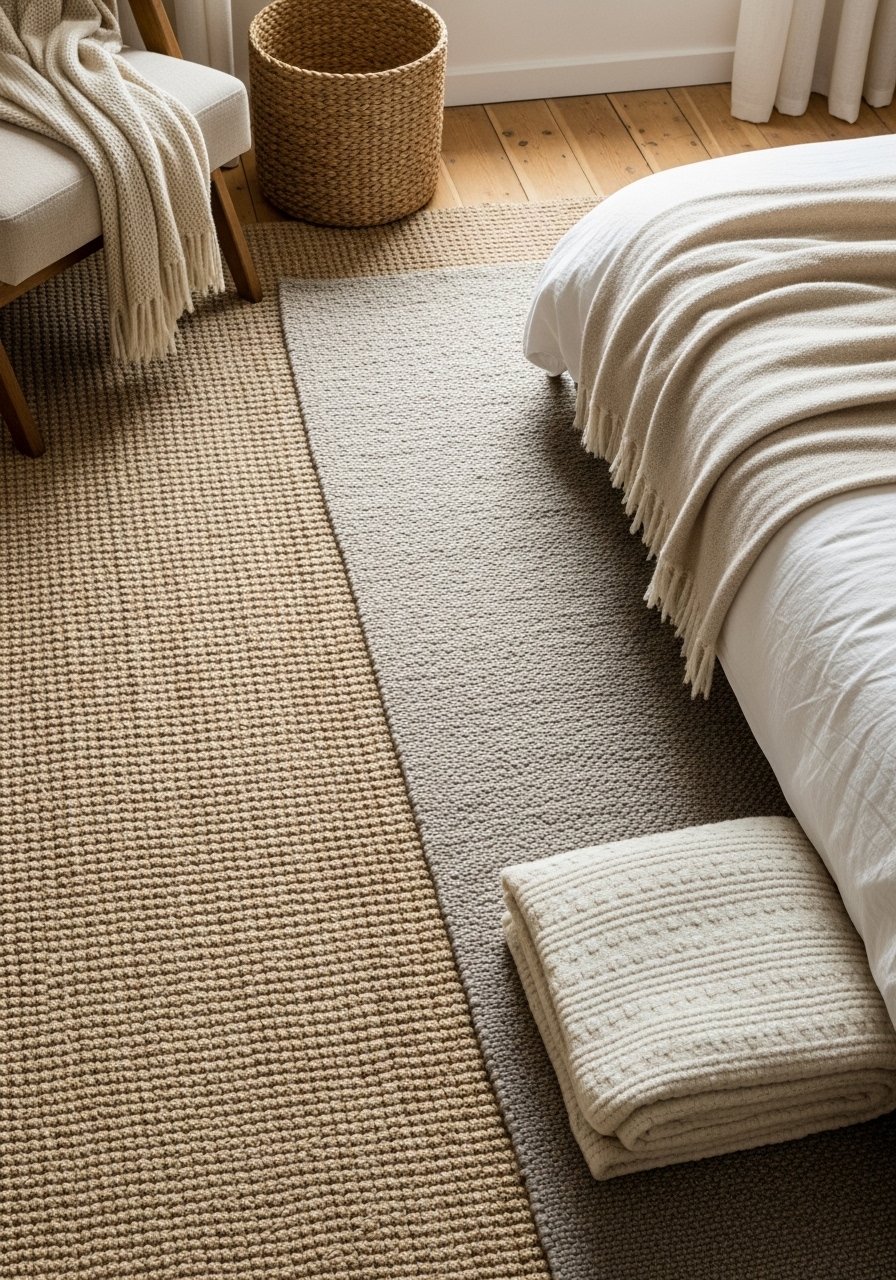
Layering textures keeps neutral rooms from feeling flat. Combining a natural jute rug with a plush wool rug and soft throws underfoot creates comfort and sound dampening—both helpful for better sleep. This approach is tactile and visually soothing.
Ingredients
- 1 flat-woven natural fiber rug (jute)
- 1 plush area rug (neutral wool or synthetic)
- 1 lightweight throw (cotton or linen)
- 1 chunky knit blanket
- 4 rug pads (non-slip)
- 1 lint roller (for wool)
- 1 vacuum or robot vacuum
- 1 carpet rake (optional)
- 1 rug tape (for edges)
- 1 small rug brush
Instructions
- Place the flat-woven rug first to anchor the room.
- Center the plush rug over it, leaving a natural border of jute visible.
- Secure both with rug pads to prevent slipping.
- Fold the throw and place at the foot of the bed or a reading chair.
- Smooth fibers with a rug brush and spot-clean stains promptly.
- Vacuum weekly with a gentle setting or use a robot vacuum for hands-off maintenance.
- Rotate rugs seasonally to balance wear.
- Use rug tape on edges that curl to prevent tripping.
How to Serve It
- Place a soft rug under the bedside edge for warm feet each morning.
- Complement textures with linen shams and a woven basket for extra throws.
- Store extra blankets in a woven storage basket.
- Make-ahead: wash throws and brush rugs monthly to keep fibers fluffy.
5. Neutral Bedroom Decor: Soft Lighting Scheme
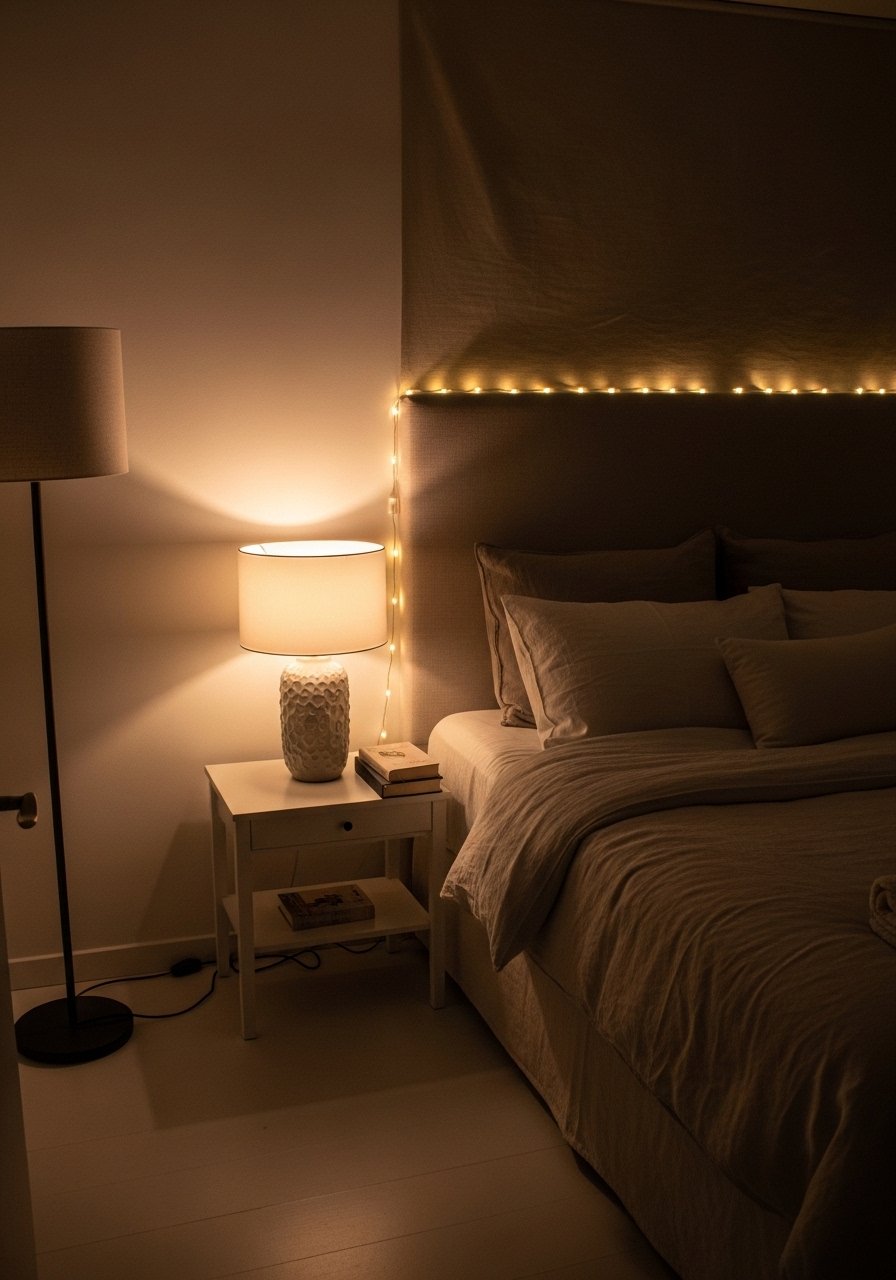
Soft layered lighting is how you set the tone for sleep. This neutral bedroom decor recipe mixes warm table lamps, indirect floor lighting, and optional string lights to create a sleep-friendly glow. The color temperature and placement matter more than brightness.
Ingredients
- 2 bedside table lamps (warm bulbs)
- 1 floor lamp with dimmer
- 1 dimmable smart plug or dimmer switch
- 1 string light or LED strip (warm white)
- 4 warm-tone LED bulbs (2700K)
- 1 bedside lamp shade in neutral fabric
- 1 small timer or smart plug
- 1 surge protector
- 1 step ladder
- 1 cable clips
Instructions
- Install warm 2700K bulbs in all fixtures.
- Position bedside lamps for reading and low ambient light.
- Add a floor lamp to wash light upwards, avoiding direct glare.
- Conceal string lights behind the headboard for a gentle halo.
- Put lamps on a smart plug to set a dimming schedule.
- Use cable clips to hide cords and keep surfaces tidy.
- Test dim settings so the lowest level is still warm and visible.
- Replace bulbs with LED warm-tone ones for energy savings.
How to Serve It
- Set a “wind down” lighting scene 45 minutes before bed.
- Pair lighting with blackout curtains to control external light.
- Store spare bulbs in a small metal box on a shelf.
- For reading, use a directional clip-on reading light to avoid brightening the whole room.
6. Calming Color Palette “Recipe” with Paint and Accents
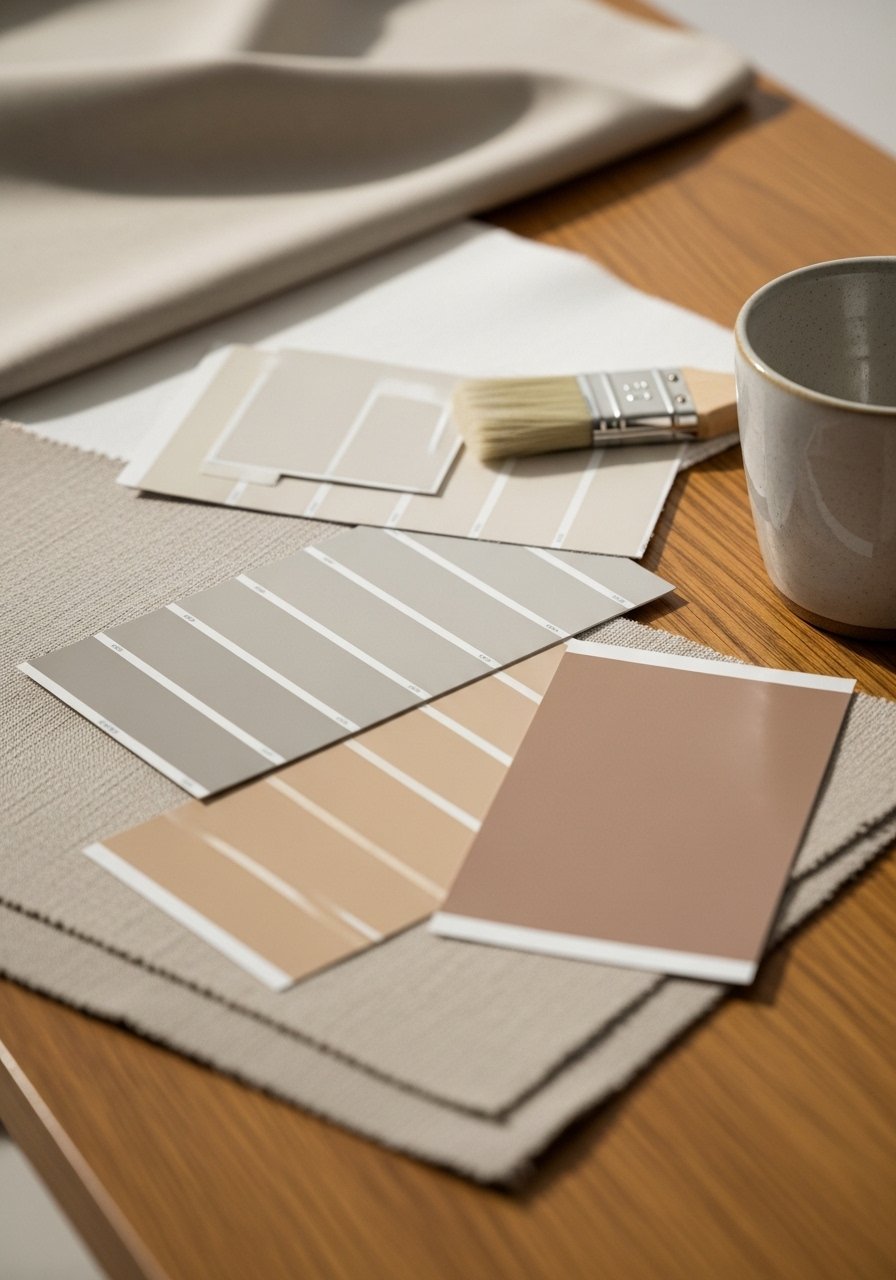
A soothing palette is the backbone of restful decor. This recipe combines muted greige walls, warm whites for trim, and clay accents to create a modern neutral backdrop. Paint color multiplied by texture makes the room settle into a restful mood.
Ingredients
- 1 gallon muted greige paint (sample first)
- 1 quart warm white trim paint
- 3 paint swatches for testing
- 1 angled brush and roller set
- 1 painter's tape roll
- 1 sample-sized clay accent pillow
- 2 coordinating throws or shams
- 1 drop cloth
- 1 paint tray
- 1 small step ladder
Instructions
- Test paint swatches on the wall and observe at different times of day.
- Tape off trim and baseboards with painter's tape.
- Prime if necessary, then roll the main wall color in “W” patterns for even coverage.
- Cut in edges with an angled brush and paint trim with warm white.
- Let paint cure 24 hours before moving furniture back.
- Add clay-toned pillows and a neutral throw to tie the palette together.
- Soften corners with a small plant or woven basket.
- Use a paint edger for crisp lines.
How to Serve It
- Pair with natural wood furniture to keep tones warm.
- Keep a small can of touch-up paint on a closet shelf.
- Swap accent pillows seasonally to refresh the palette without repainting.
- For renters, use removable peel-and-stick wallpaper for an accent wall instead of paint.
7. Headboard Makeover Recipe for Quiet Focus
An upholstered headboard softens sound and creates a calm focal point. This quick makeover uses neutral fabric and simple details to add comfort without overwhelming the room. It’s a small change with a big impact on how restful the space feels.
Ingredients
- 1 upholstered headboard (DIY kit or ready-made)
- 1 foam padding sheet (if DIY)
- 1 neutral upholstery fabric (enough yardage)
- 8 drywall anchors and screws
- 1 measuring tape
- 1 staple gun (for DIY)
- 1 set of mounting brackets
- 1 drill
- 1 upholstery nails (optional)
- 1 level
Instructions
- Measure bed width and decide headboard height (typically 48–60 inches).
- If DIY, cut foam padding to size and wrap fabric, securing with a staple gun.
- Attach mounting brackets to the headboard per instructions.
- Mark wall studs and mount brackets at the correct height using a level.
- Hang the headboard and tighten screws.
- Add shams and pillows to soften the transition from bed to wall.
- Use small wall pads behind brackets to prevent noise.
- Touch up with a fabric protector spray if needed.
How to Serve It
- Lean a book or tray against the headboard for a lived-in look.
- Pair with soft wall art and dimmable sconces for gentle illumination.
- For cleaning, use a handheld vacuum set to upholstery mode.
8. Pillow Menu “Recipe” for Personalized Comfort

Offering a pillow menu means controlling support and softness for better sleep. This recipe creates a mix of firmness levels and textures so you can adjust nightly. It’s practical and makes your bed feel curated, not crowded.
Ingredients
- 2 euro shams (supportive)
- 2 standard pillows (primary sleeping pillows)
- 2 decorative pillows (soft fill)
- 1 lumbar pillow for lower back support
- 1 set of pillow protectors
- 2 pillowcases per pillow (for rotation)
- 1 soft pillowcase fabric spray (optional)
- 1 storage basket for extra pillows
- 1 vacuum storage bag (for off-season)
- 1 label tags for pillow firmness
Instructions
- Choose two primary sleeping pillows matched to your sleep position.
- Add euro shams behind for headboard support and layering.
- Place decorative pillows in front; use lumbar for added back support when sitting.
- Label extra pillows by firmness to make swapping easy.
- Rotate pillowcases nightly to prolong freshness.
- Store extra pillows in a breathable basket or vacuum bag if not used.
- Wash pillow protectors every 3 months; fluff pillows weekly.
- Use a pillow protector to keep inserts fresh.
How to Serve It
- Offer a “soft” and “firm” pillow option each night so you can mix support.
- Keep a small step stool for easy pillow swaps on higher beds.
- For travel or guests, pack a pillow in a vacuum storage bag.
9. Calm Corner Reading Nook Recipe
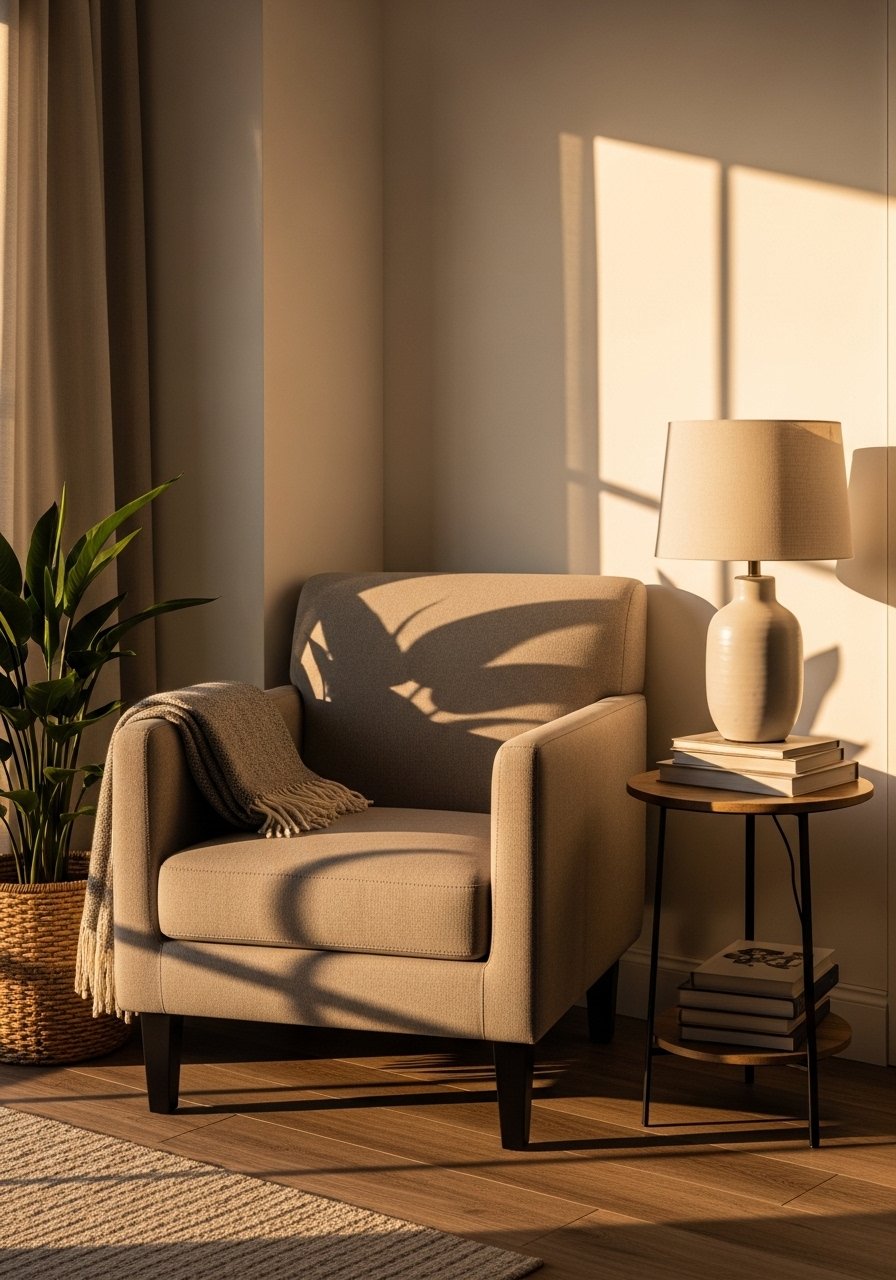
A dedicated low-light reading corner signals rest and ritual. This recipe creates a small nook with a comfortable chair, soft throw, and warm lamp—perfect for winding down with a book before sleep. Keep it small and intentional.
Ingredients
- 1 comfy accent chair (neutral tone)
- 1 soft throw blanket
- 1 small round side table
- 1 table lamp with warm bulb
- 1 floor plant or faux green
- 1 small bookshelf or basket for books
- 1 lumbar pillow
- 1 coaster for drinks
- 1 dimmable smart plug
- 1 small area rug to anchor the space
Instructions
- Choose a corner near a power outlet and place the chair angled slightly towards the room.
- Add a side table within arm’s reach and a lamp with a warm bulb.
- Drape the throw over the chair for tactile comfort.
- Place a small stack of current reads on the table or in a basket.
- Add a plant to soften corners and improve air quality.
- Set the lamp on a smart plug to dim automatically at bedtime.
- Keep the nook decluttered; rotate reading materials monthly.
- Test the chair’s comfort for 10–15 minutes to ensure it encourages rest, not slumping.
How to Serve It
- Keep a lightweight blanket in a woven basket.
- Pair with a warm herbal tea before bed.
- For small spaces, use a wall sconce instead of a table lamp.
10. Natural Fiber Curtains Recipe
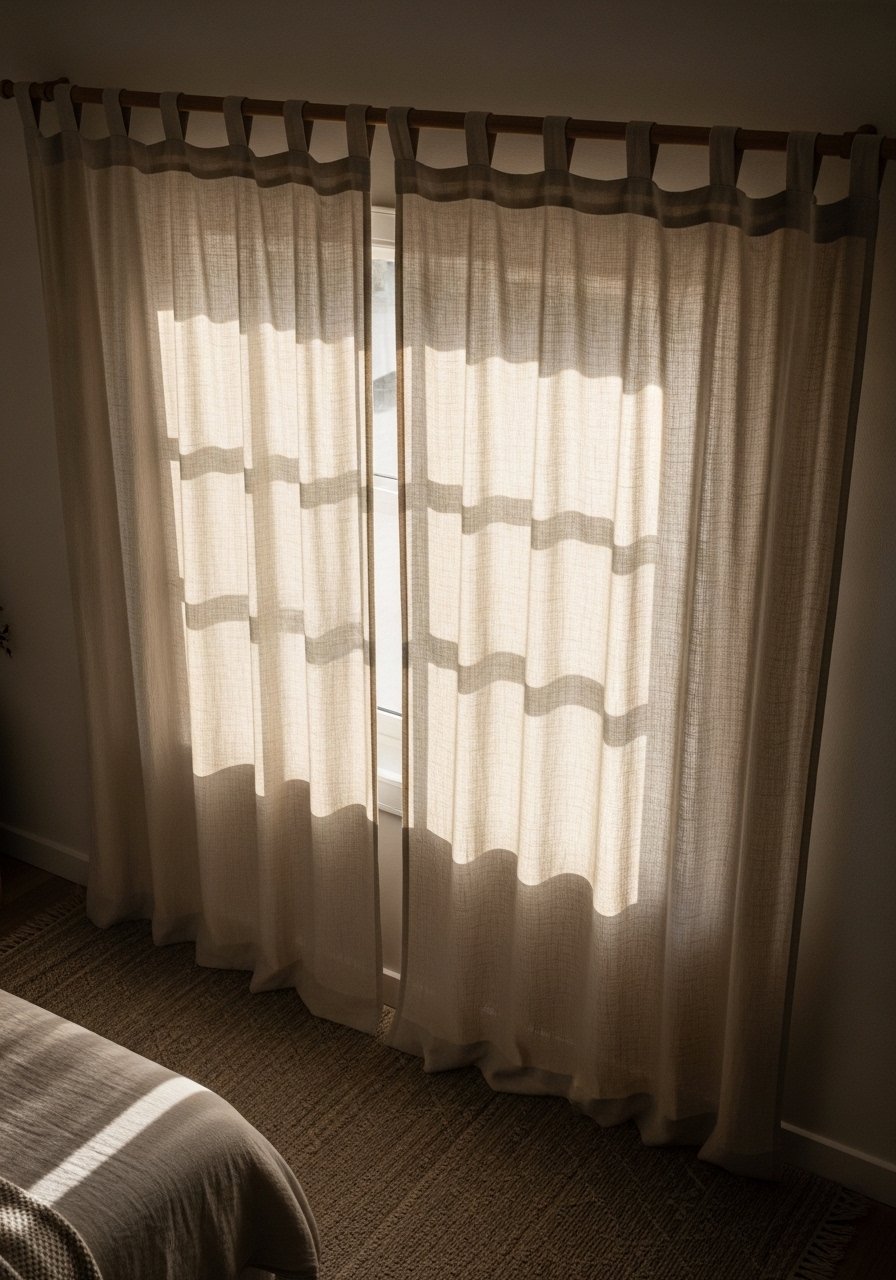
Natural fiber curtains bring warmth and filter light gently. This recipe uses unbleached linen or cotton for breathable coverage that still keeps the room bright and calm. They’re easy to launder and age beautifully.
Ingredients
- 2 natural fiber curtain panels (linen or cotton)
- 1 wooden curtain rod
- 1 set of curtain rings or grommets
- 1 hanging brackets and screws
- 1 fabric brush
- 1 linen-safe detergent
- 1 tape measure
- 1 step ladder
- 1 curtain tiebacks
- 1 ironing board or fabric steamer
Instructions
- Measure window height and choose panel length to just kiss the floor.
- Install the rod securely, ensuring even weight distribution.
- Hang panels and arrange soft folds for a relaxed feel.
- Treat stains immediately and launder on a gentle cycle.
- Press or steam panels to remove creases while slightly damp.
- Use tiebacks during the day to let in light.
- Replace panels seasonally to reduce fading.
- Use a fabric steamer to maintain a soft drape.
How to Serve It
- Keep curtains slightly open during the day for natural light.
- Use a simple weighted hem to help panels hang straight.
- Store seasonal curtains in a cloth storage bag.
11. Calm Wall Art “Recipe” for Restful Views
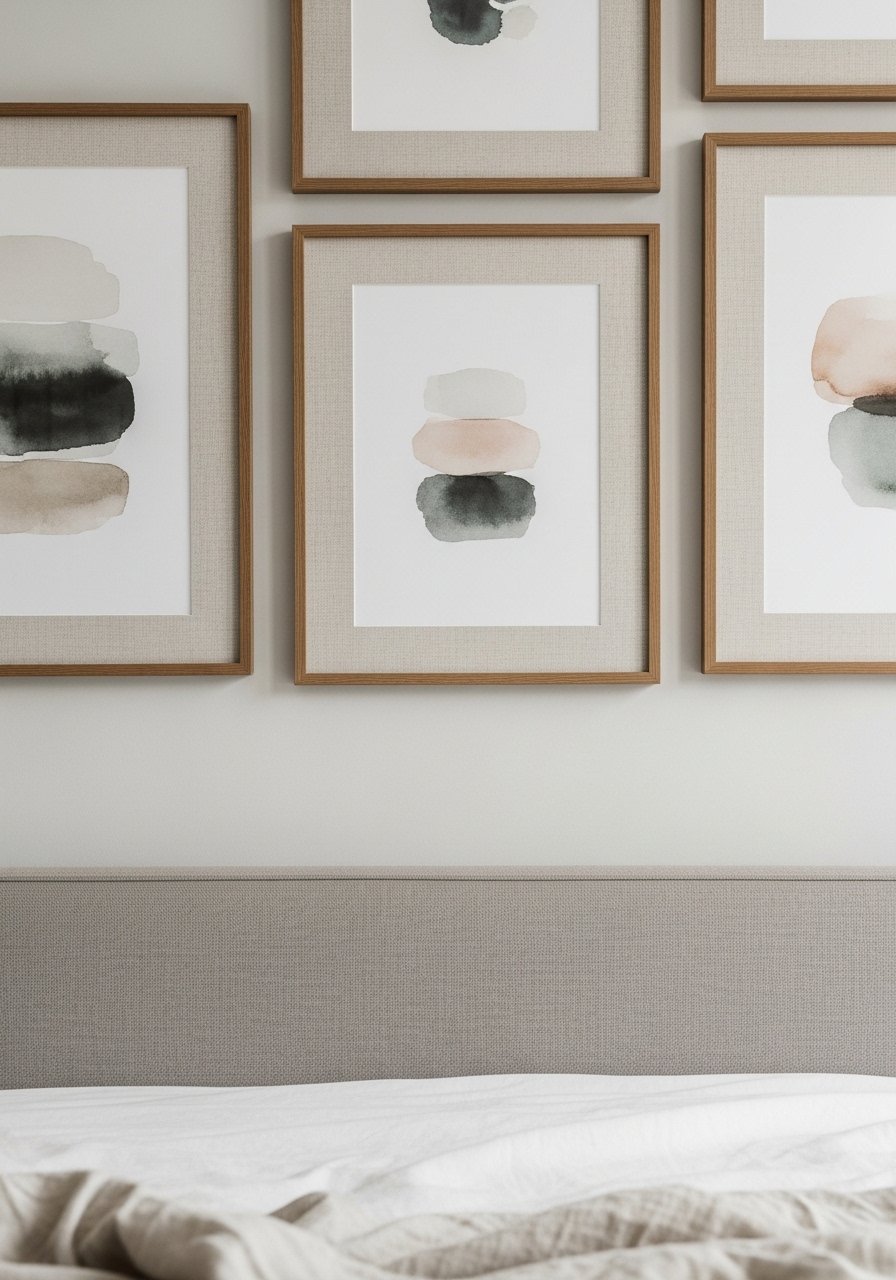
Choose art that encourages a quiet mind. This recipe favors muted abstracts and natural imagery in thin wood frames for a soothing wall display. Scale and spacing are key—too many small pieces create visual noise.
Ingredients
- 3–5 framed art prints (muted palette)
- 1 measuring tape and level
- 1 picture hanging kit
- 1 neutral matting for prints
- 1 artist-grade prints or high-resolution reproductions
- 1 hammer
- 1 small set of nails and anchors
- 1 command strips for renters
- 1 drop cloth
- 1 cleaning cloth
Instructions
- Lay prints on the floor to find a pleasing layout and spacing.
- Choose a focal piece centered above the bed or dresser.
- Measure and mark hanging points using a level to ensure straight lines.
- Install anchors or use command strips depending on wall type.
- Hang each print and adjust spacing until it feels balanced.
- Dust frames monthly with a soft cloth.
- Rotate prints occasionally to refresh the mood.
- Use command picture hanging strips for renter-friendly hanging.
How to Serve It
- Keep frames simple and consistent for a cohesive look.
- Pair art with a soft sconce to create a glow that highlights textures.
- For seasonal switch-ups, store extra prints in a flat storage portfolio.
12. Neutral Bedroom Decor: Bedside Tech Minimalism

Tech can interfere with sleep, but you can still keep essentials near the bed. This recipe hides charging clutter with a small docking tray and uses a single low-brightness device for alarms. The result is a clean surface and fewer bright screens.
Ingredients
- 1 wooden docking tray or valet
- 1 slim charging pad (wireless)
- 1 bedside alarm (analog or simple digital)
- 1 cord organizer
- 1 small box for earbuds
- 1 blue-light blocking glasses (on stand)
- 1 power strip with surge protection
- 1 outlet shelf (optional)
- 1 small nightlight (warm tone)
- 1 pair of earplugs in a case
Instructions
- Decide which tech you need within arm’s reach and remove the rest.
- Set up a single wireless charging pad in the docking tray for devices.
- Use cord organizers to hide cables behind the nightstand.
- Keep alarm devices on low brightness or analog if possible.
- Store earbuds and chargers in a small box to avoid visual clutter.
- Put blue-light glasses on the tray to encourage unplugging before bed.
- Use a power strip with surge protection and mount it behind the nightstand.
- Test that the setup charges devices overnight without bright lights.
How to Serve It
- Charge devices in the dock and place them face down to reduce temptation.
- Use an analog alarm clock to avoid screen glare.
- For long vacations, store tech in a bedside drawer to preserve the minimalist vibe.
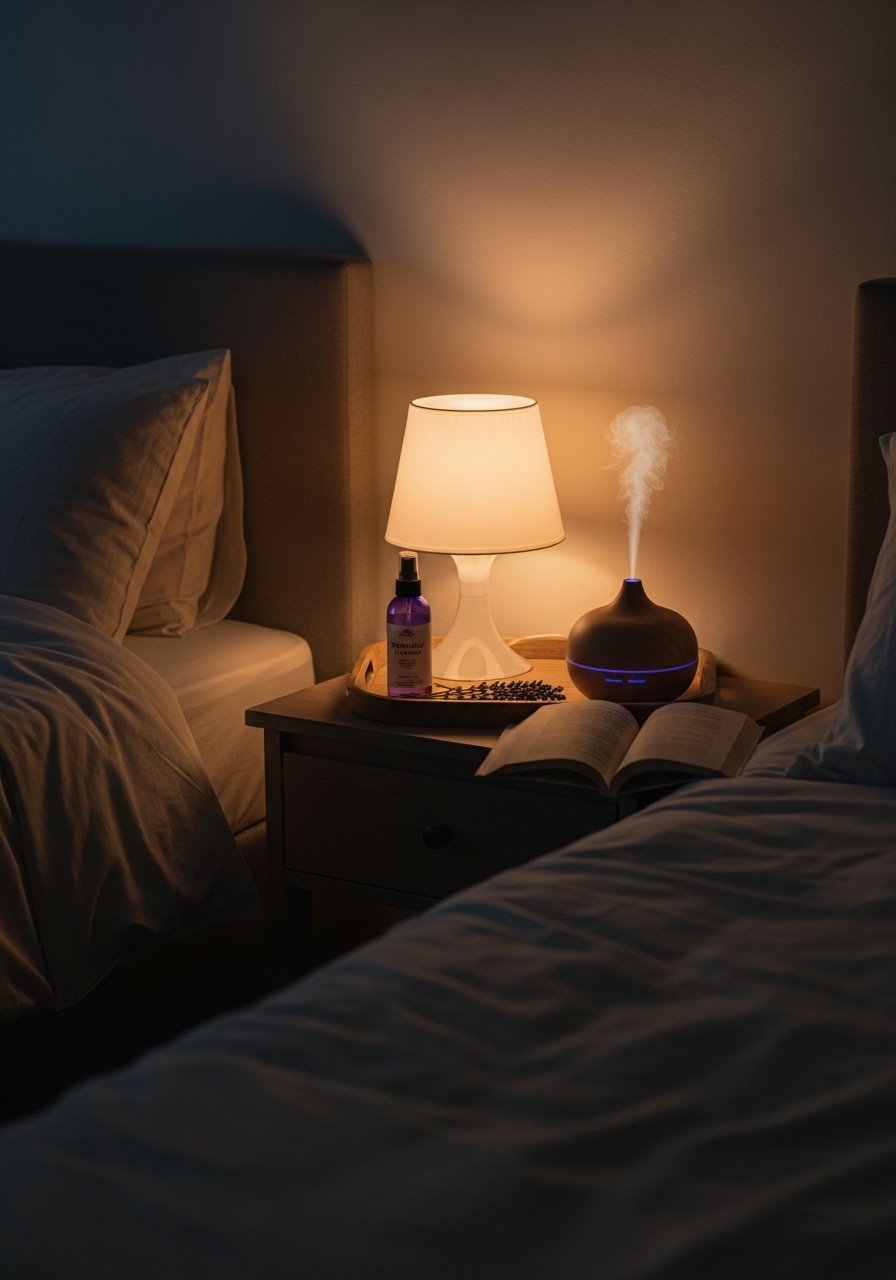
13. Soothing Scent Routine “Recipe”
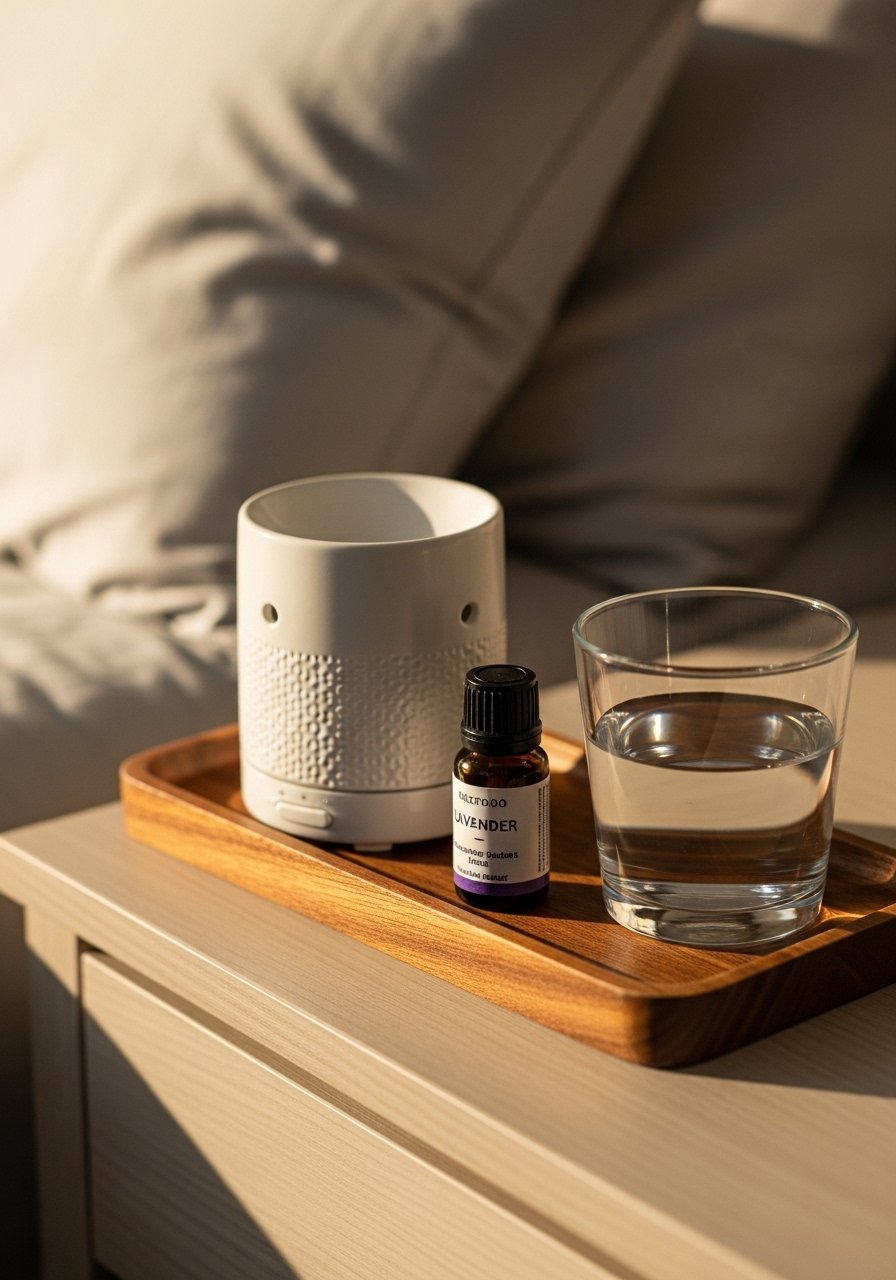
Scent plays quietly on your nervous system. This recipe sets a short aromatherapy routine with a diffuser or linen spray using calming scents like lavender or cedar. Keep it subtle—strong fragrance can be disruptive.
Ingredients
- 1 ultrasonic diffuser (small bedroom size)
- 2–3 essential oils (lavender, cedarwood, bergamot)
- 1 linen spray bottle (3–4 oz)
- 1 amber glass bottle for blends
- 1 distilled water
- 1 measuring dropper
- 1 tray to keep things tidy
- 1 small funnel
- 1 cloth for spills
- 1 instruction card for blends
Instructions
- Fill the diffuser with distilled water per manufacturer instructions.
- Add 3–4 drops of lavender and 1–2 drops of cedarwood.
- Run the diffuser on a low intermittent setting for 20–30 minutes before bed.
- Make a linen spray by mixing 5 drops lavender with distilled water in a small spray bottle; shake before use.
- Lightly mist pillows and duvet from a distance of 12 inches.
- Store oils in amber bottles away from sunlight.
- Clean diffuser weekly to prevent buildup.
- Use a small ultrasonic diffuser suited for bedroom size.
How to Serve It
- Pair scent with dim lighting and your favorite book for a relaxing pre-sleep ritual.
- Keep oils labeled and store in a small wooden tray to prevent spills.
- For guests, offer unscented bedding and keep scent options optional.
14. Decluttered Closet “Recipe” for Better Sleep

A cluttered closet can clutter the mind. This recipe organizes clothing and storage so your bedroom feels calm. Uniform hangers and labeled boxes create visual harmony and make morning routines quicker—reducing stress before bed.
Ingredients
- 1 set of matching slim hangers (wood or velvet)
- 4 labeled storage boxes
- 1 shoe organizer
- 1 small step stool
- 1 shelf dividers
- 1 fabric storage bins for seasonal items
- 1 closet rod extender (if needed)
- 1 decluttering checklist
- 1 small vacuum for floor cleaning
- 1 cedar blocks or sachets
Instructions
- Empty the closet and sort items by keep, donate, mend, or toss.
- Install uniform hangers and group garments by type and color.
- Place seasonal items in labeled boxes on the top shelf.
- Use shelf dividers to keep stacks tidy.
- Store shoes in a neat organizer or clear boxes.
- Add cedar blocks to deter moths and add a soft scent.
- Sweep or vacuum the closet floor and return items in an ordered way.
- Keep a donation bin outside the closet to prevent clutter accumulation.
How to Serve It
- Rotate seasonal clothes into storage bins to keep daily selection simple.
- Keep one shelf for “bedtime” items like slippers and pajamas.
- Store small accessories in a fabric organizer.
15. Nighttime Soundscape Recipe with White Noise

A consistent low-level sound can mask disruptive noises and help you fall asleep faster. This recipe uses a white noise machine or app with gentle settings and a consistent schedule. Positioning and volume are important to avoid overstimulation.
Ingredients
- 1 white noise machine (bedroom suitable)
- 1 small stand or tray to place device
- 1 low-volume sleep playlist (optional)
- 1 set of earplugs for travel
- 1 timer or smart plug
- 1 spare batteries or charger
- 1 small sticky pad to prevent movement
- 1 instruction manual for device
- 1 list of preferred sound settings
- 1 maintenance cloth
Instructions
- Place the white noise machine 2–3 feet from your head, on the opposite side of possible noise sources.
- Choose a gentle sound setting like “rain” or “soft fan.”
- Set volume to a level that masks noise but doesn’t overpower conversation.
- Put the machine on a timer or smart plug to turn off after a few hours if desired.
- Test different sound types for a few nights to find your preference.
- Keep the machine dust-free and charged.
- For travel, pack a small, portable white noise device.
- Use earplugs if you prefer total silence occasionally.
How to Serve It
- Use the machine all night or just during initial sleep onset—experiment.
- Keep a spare device in your travel bag for consistent sleep on the go.
- Store extra earplugs in a small travel case.
16. Weighted Blanket “Recipe” for Gentle Pressure
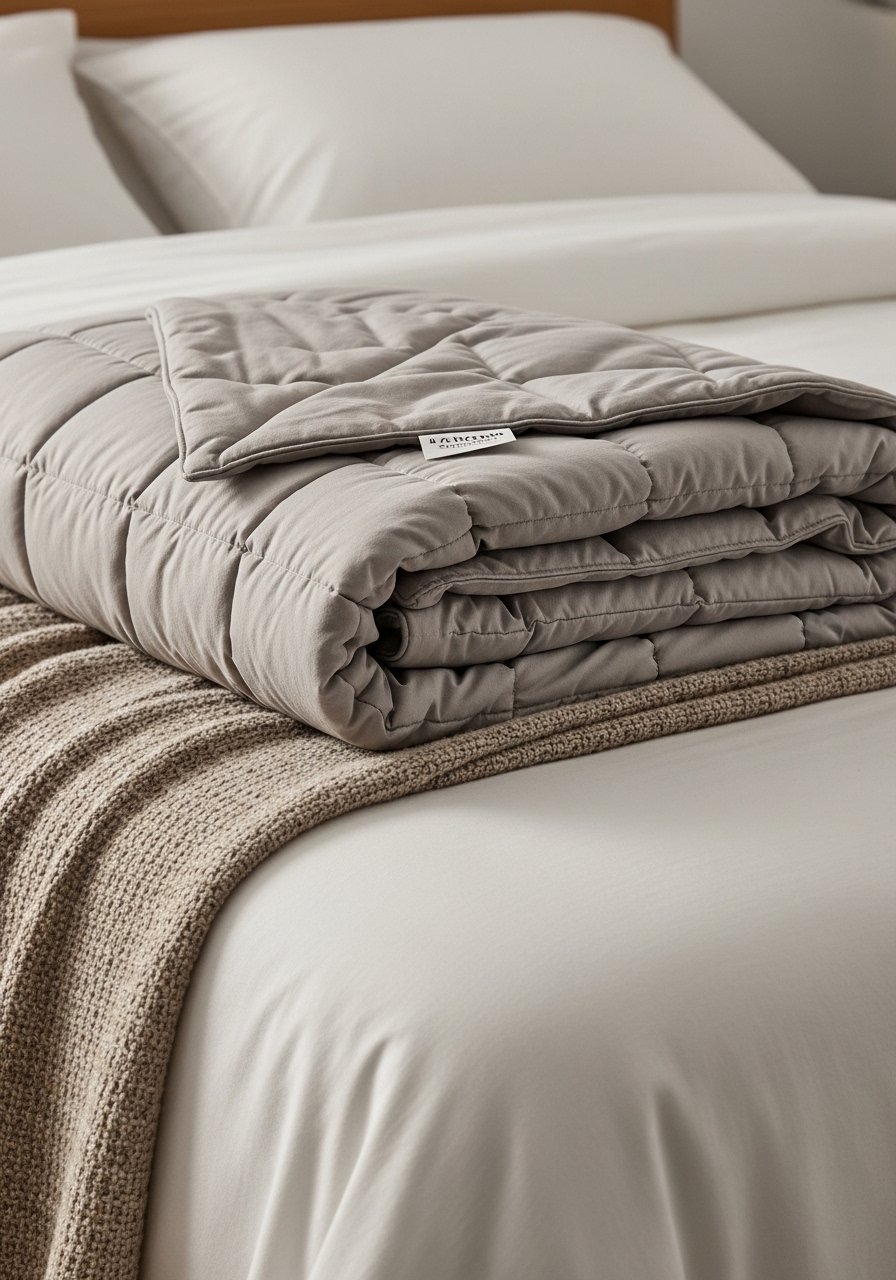
Weighted blankets provide gentle pressure that can help reduce anxiety and improve sleep onset. This recipe guides you to select the right weight and integrate it into your bedding for cozy, non-restrictive comfort.
Ingredients
- 1 weighted blanket (choose weight ~10% of body weight)
- 1 removable cotton cover (machine washable)
- 1 throw or lightweight blanket for layering
- 1 storage bag for off-season
- 1 care instructions card
- 1 sewing kit (for minor repairs)
- 1 lint roller
- 1 bedspread to tuck edges (optional)
- 1 measuring tape (to check blanket size)
- 1 pillow for head support
Instructions
- Choose a weighted blanket about 10% of your body weight for comfortable pressure.
- Use a breathable cotton cover to regulate temperature.
- Lay the blanket across the lower two-thirds of the bed rather than fully over the head.
- Tuck the edges lightly to prevent bunching while allowing some movement.
- Wash the cover regularly; spot-clean the weighted insert per manufacturer directions.
- Rotate blanket to prevent uneven wear on fill.
- Store in a breathable storage bag when not in use.
- Test the weight for a week and adjust if it feels too heavy.
How to Serve It
- Use as a top layer in cooler months, and folded at the foot in summer.
- Offer an extra blanket for guests with different weight preferences.
- Keep the cover fresh by laundering weekly if used nightly.
17. Mattress Topper “Recipe” for Extra Plushness

A mattress topper can change your bed’s feel without replacing the mattress. This recipe walks you through choosing thickness and material for pressure relief and temperature regulation. It’s a budget-friendly way to improve sleep.
Ingredients
- 1 mattress topper (memory foam or down alternative)
- 1 mattress protector (waterproof, breathable)
- 1 fitted sheet to fit deeper mattress + topper
- 1 measuring tape
- 1 vacuum storage bag (for packaging leftover)
- 1 mattress pad clips (if needed)
- 1 rolling helper (optional)
- 1 instructions tag
- 1 lint-free cloth for dusting
- 1 airing rack (for freshening)
Instructions
- Measure your mattress depth and pick a topper thickness that fits—usually 2–4 inches.
- Unbox the topper and let it expand fully on the mattress for 24 hours if memory foam.
- Place a breathable mattress protector over the topper to keep things clean.
- Secure the topper with clips or a deep-pocket fitted sheet.
- Test for firmness over several nights to confirm comfort.
- Rotate the topper occasionally to even out wear.
- For heat-sensitive sleepers, choose a gel-infused topper and ventilate nightly.
- Use a mattress protector to prolong life.
How to Serve It
- Pair with breathable sheets and a light duvet for temperature comfort.
- Store extra toppers in a clean, dry storage bag if swapping seasons.
- For maintenance, air it outside periodically to reduce odors.
18. Cozy Reading Lamp “Recipe” with Dimmable Light

A focused, dimmable reading lamp helps you transition to rest without lighting the whole room. This recipe prioritizes warm light and adjustable direction so you can read without disturbing a partner.
Ingredients
- 1 adjustable reading lamp (arm or swing)
- 1 warm-tone LED bulb (2700K)
- 1 dimmable smart bulb or plug
- 1 small bedside table
- 1 coaster for a warm drink
- 1 lamp shade in neutral fabric
- 1 cable clip set
- 1 surge protector
- 1 instruction manual
- 1 small nightstand tray
Instructions
- Mount or place the lamp so the arm reaches over your shoulder area when seated.
- Install a warm 2700K bulb and test brightness.
- Add a dimmable smart bulb or smart plug to adjust light levels.
- Tuck cords with cable clips behind furniture.
- Use a soft shade to diffuse harsh light.
- Position a coaster for a bedtime beverage and a tray for glasses or bookmark.
- Keep the lamp switch within easy reach so you don’t turn on bright overhead lights.
- Clean the shade and lamp base monthly.
How to Serve It
- Use the lamp for 20–30 minutes of reading as your wind-down ritual.
- Pair with a small reading pillow and a soft throw.
- Store spare bulbs in a drawer or a small parts organizer.
19. Natural Plant Corner “Recipe” for Cleaner Air
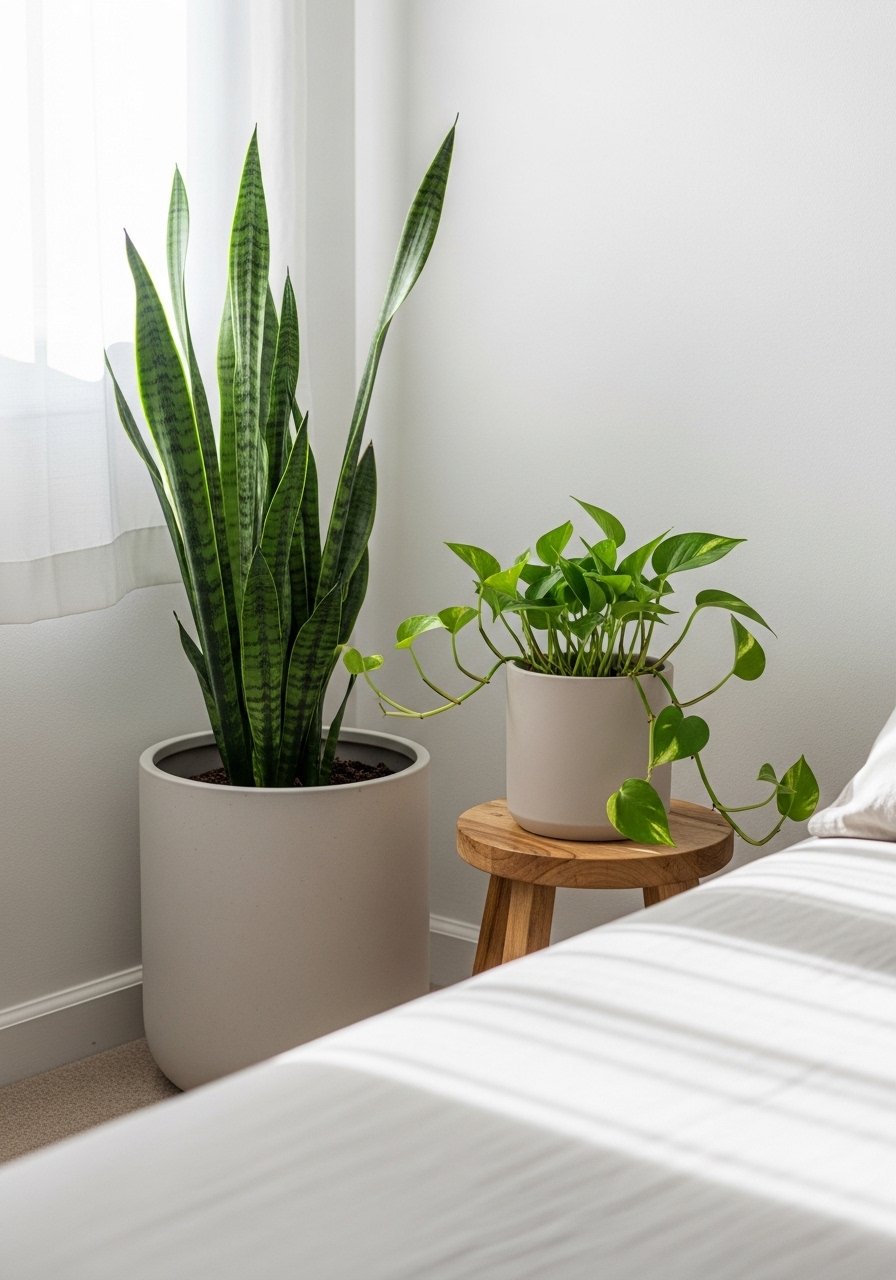
Plants can add life and improve air quality subtly. This recipe picks low-light, low-maintenance varieties that thrive in bedrooms and require minimal upkeep—perfect if you want nature without extra chores.
Ingredients
- 1 snake plant (Sansevieria)
- 1 pothos or philodendron
- 1 small planter with drainage
- 1 saucer for excess water
- 1 potting mix for indoor plants
- 1 small watering can
- 1 humidity tray (optional)
- 1 plant stand or stool
- 1 pruning shears
- 1 plant care tag
Instructions
- Select plants suited to your bedroom’s light—snake plant for low light, pothos for medium.
- Pot plants in well-draining soil and place saucers underneath to catch water.
- Position plants away from direct drafts and heater vents.
- Water sparingly—most indoor plants prefer to dry slightly between waterings.
- Prune yellow leaves and wipe foliage monthly to keep leaves clean.
- Feed with a diluted fertilizer every 6–8 weeks during growing season.
- Use a small watering can for controlled watering.
- Replace or repot plants every 1–2 years as needed.
How to Serve It
- Place plants in a decorative planter that complements your neutral palette.
- Rotate plants every few weeks for even growth.
- For low-maintenance styling, use a faux plant in a textured basket.
20. Soft Headboard Lighting “Recipe” with Sconces

Wall sconces free up nightstand space and provide even bedside lighting. This recipe installs low-profile sconces with warm bulbs and dimming capability for a cozy, uncluttered look. It keeps surfaces clear and light soft.
Ingredients
- 2 wall sconces with warm LED bulbs
- 1 stud finder and drill
- 1 electrical box or plug-in kit
- 1 dimmer switch or smart bulb
- 1 measuring tape
- 1 painter's tape for layout
- 1 wire connectors
- 1 small wall anchors
- 1 level
- 1 electrician’s tape (if needed)
Instructions
- Plan sconce height—typically 48–60 inches from the floor or 6–8 inches above the headboard.
- Use a stud finder and mark mounting locations with painter’s tape.
- Install electrical boxes or use plug-in sconces for easy setup.
- Mount sconces securely and install bulbs.
- Add a dimmer or smart bulbs for adjustable brightness.
- Tidy wires behind the wall or conceal with a fabric cord cover.
- Angle sconces inward slightly to focus light on reading areas.
- Test dim levels to ensure a warm glow at lowest setting.
How to Serve It
- Use sconces for reading and nighttime ambiance while keeping the nightstand free for water and books.
- Store small items in a bedside drawer rather than on the surface.
- For renters, use plug-in wall sconce kits to avoid wiring.
21. Soft Window Seat “Recipe” for Restful Lounging

A window seat creates a cozy nook for rest and reflection. This recipe uses a plush cushion, layered pillows, and storage beneath to keep the area neat. The result is a restful, inviting spot ideal for afternoon naps.
Ingredients
- 1 custom or ready-made window seat cushion (measure precisely)
- 3 assorted pillows in neutral tones
- 1 woven basket for throw storage
- 1 small side table or ledge
- 1 removable cushion cover for laundry
- 1 non-slip mat under cushion
- 1 small reading lamp or pendant
- 1 storage hinge kit (if seat opens)
- 1 fabric cleaner
- 1 measuring tape
Instructions
- Measure the seat area and order or cut a cushion to fit snugly.
- Place a non-slip mat below the cushion to prevent sliding.
- Arrange pillows for back support and a layered look.
- Add a small lamp or pendant for a reading light.
- Store extra blankets in a woven basket underneath the seat.
- Use removable covers for easy washing.
- Keep the space clear of clutter—one stack of books is enough.
- For hinged seats, install soft-close hardware for quiet opening.
How to Serve It
- Use the window seat for 20–30 minute afternoon rests.
- Pair with a small tray for tea or a book.
- Store seasonal items in hidden storage using fabric storage bins.
22. Neutral Accent Wall “Recipe” with Texture
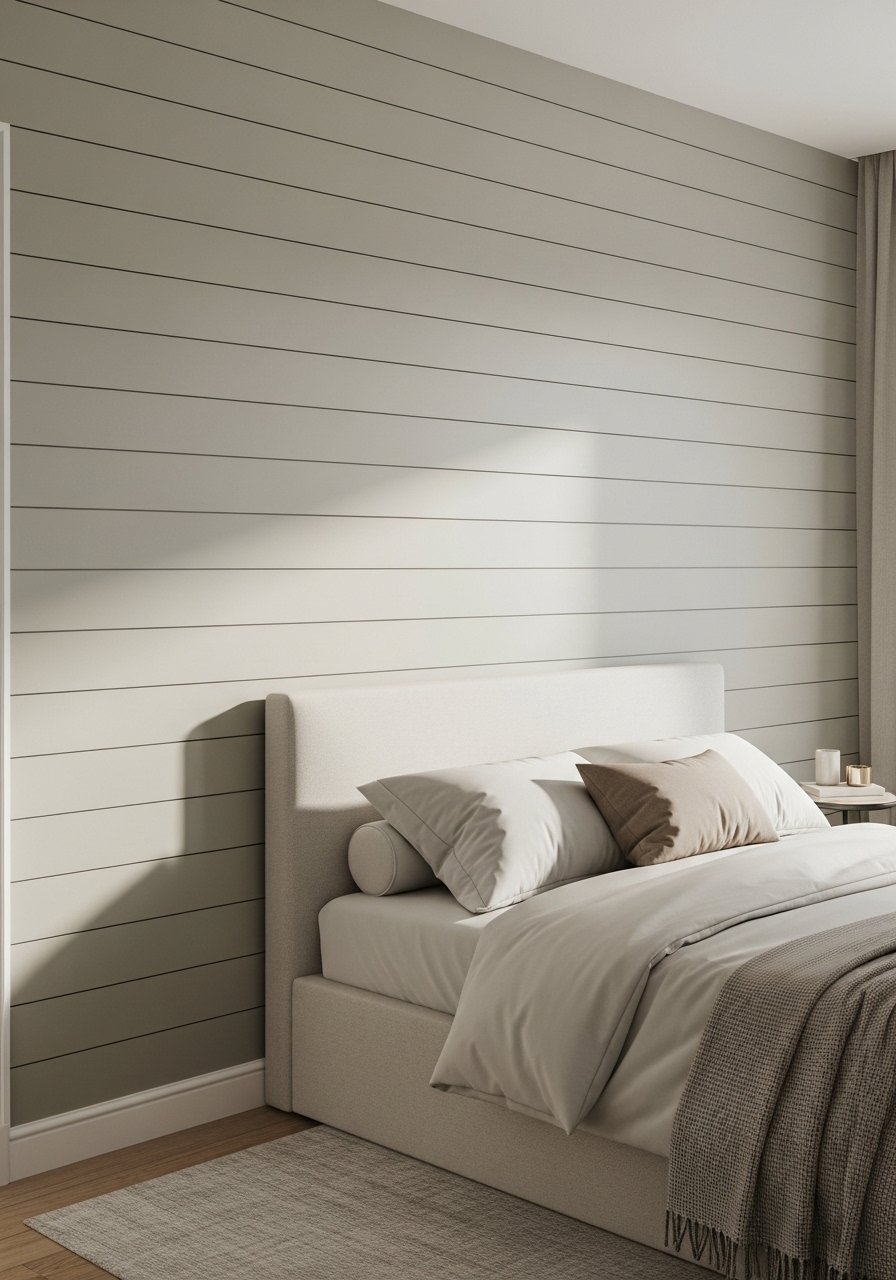
An accent wall adds depth without loud color. This recipe uses shiplap, plaster, or linen-textured wallpaper in a neutral tone to create a restful focal point that feels grounded and cozy.
Ingredients
- 1 paneling kit (shiplap or beadboard) or textured wallpaper
- 1 neutral paint or stain (if wood)
- 1 installation adhesive and nails
- 1 caulk and painter’s tape
- 1 putty knife and sandpaper
- 1 measuring tape and level
- 1 drop cloth
- 1 small paint roller
- 1 paint tray
- 1 touch-up brush
Instructions
- Choose the texture and finish that complements existing tones in the room.
- Prepare the wall—clean, patch holes, and sand if needed.
- Install paneling or apply wallpaper per package instructions.
- Paint or stain paneling with a soft neutral to tie into the room palette.
- Fill any seams and sand smooth before a final touch-up.
- Let the wall cure for 24 hours before rehanging art or moving furniture.
- Add minimal decor to keep focus on texture rather than objects.
- Use a sponge roller for even paint on textured surfaces.
How to Serve It
- Pair with a low-profile bed to showcase the wall.
- Keep bedding neutral and add a single accent pillow to echo texture.
- Store leftover paneling pieces for repairs in a closet or plastic tub.
23. Neutral Bedding Swap “Recipe” for Seasonal Comfort

Swapping bedding seasonally keeps your sleep environment temperature-appropriate and visually fresh. This recipe helps you choose materials and store off-season sets so your bed always feels tailored to the current season.
Ingredients
- 1 lightweight cotton sheet set (summer)
- 1 percale or sateen set (spring/fall)
- 1 flannel sheet set (winter)
- 1 breathable duvet insert (all-season)
- 1 duvet cover in neutral tone
- 1 storage bag or vacuum storage bag
- 1 mattress protector
- 1 pillow protectors
- 1 fabric detergent for delicates
- 1 labelled shelf or bin
Instructions
- Choose sheet materials appropriate to the season: cotton or linen for summer, flannel for winter.
- Rotate sets at the season change and launder before storing.
- Keep a neutral duvet cover year-round and swap the duvet insert if needed.
- Fold bedding neatly and store in a breathable bag or vacuum bag if space is tight.
- Label each bag with season name for easy access.
- Air out stored sets before using them again.
- Replace small linens like pillowcases more often than heavy items.
- Keep a spare sheet set in a dedicated drawer for emergencies.
How to Serve It
- Store off-season sets in a linen closet or labeled storage bin.
- Use a neutral duvet cover to maintain a calm aesthetic year-round.
- For guest readiness, keep one fresh set easily accessible.
24. Calm Ceiling Fan “Recipe” for Gentle Airflow

Gentle airflow helps regulate temperature and creates a low-level white noise. This ceiling fan recipe focuses on quiet models with soft blades and a warm light option to support sleep rather than disturb it.
Ingredients
- 1 quiet ceiling fan with reversible motor
- 1 LED warm-tone bulb (if fan has light)
- 1 remote or wall control
- 1 installation kit and mounting bracket
- 1 electrician or professional install if needed
- 1 ladder
- 1 stud finder
- 1 torque-rated screws
- 1 balancing kit (to reduce wobble)
- 1 instruction manual
Instructions
- Choose a low-CFM, quiet fan designed for bedrooms; check noise ratings.
- Turn off power at the circuit breaker before installation.
- Use a stud finder and secure the mounting bracket to ceiling joists.
- Follow manufacturer instructions to wire and mount the fan; hire an electrician if unsure.
- Install a remote or wall control for easy speed adjustments.
- Balance blades using the included kit to prevent wobble and extra noise.
- Use the reverse setting for seasonal airflow changes.
- Clean blades quarterly to maintain efficiency and quiet operation.
How to Serve It
- Set fan to low for gentle white noise during sleep.
- Pair with a smart thermostat to coordinate temperature.
- Replace old noisy fans to avoid sleep disruption.
25. Sleep Sound Setup “Recipe” with Bedtime Ritual
A consistent bedtime ritual signals your brain that it’s time to sleep. This recipe combines light, scent, sound, and a short routine to prime your mind and body for rest. Simplicity is key—keep steps under 20 minutes.
Ingredients
- 1 dimmable bedside lamp
- 1 small diffuser or candle (lavender)
- 1 white noise machine or sleep app
- 1 bedside notebook and pen
- 1 cup or thermos for warm caffeine-free tea
- 1 soft throw
- 1 sleep mask
- 1 bedtime alarm (to signal wind-down)
- 1 list of calming activities (reading, stretching)
- 1 soft playlist or guided sleep audio
Instructions
- Set a consistent wind-down time 30–45 minutes before bed.
- Dim the lights and start a diffuser with 3–4 drops of lavender.
- Write any lingering thoughts in your bedside notebook to offload the day.
- Sip a warm herbal tea while doing gentle stretches for 5–10 minutes.
- Turn on white noise at a low level or begin a sleep audio track.
- Put on a comfortable sleep mask and turn off remaining bright devices.
- Read a paper book or listen to a brief guided meditation for 10–15 minutes.
- Keep the ritual consistent nightly to train your body for sleep.
How to Serve It
- Store your bedtime notebook and pen in a small tray on the nightstand.
- Use a dimmer smart plug to automate lights.
- Keep a clean glass or thermos on a coaster to avoid spills.
- For travel, pack a lightweight version of your ritual kit in a small toiletry bag.
You've now got 25 step-by-step styling "recipes" to make neutral bedroom decor that actually helps you sleep better. Try a few of these tweaks—swap bedding, soften lighting, or create a nightly ritual—and notice how your room and routine shift toward calm. Pin or save this list so you can come back when you’re ready to refresh your space. Which recipe will you try this weekend, and which product are you curious to check out first? For an all-purpose helper that makes many of these ideas easier, consider a reliable fabric steamer to keep linens and curtains looking soft and fresh.